

Table of Contents
- Why Most Home Brewers Never Quite Get It Right (And How to Fix That)
- Start With the Bean: Freshness, Roast Profiles, and Degassing
- Best Coffee Grind Size for Different Brewing Methods
- Coffee Brewing Ratios: The Foundation of a Perfect Cup
- Water Temperature for Coffee: The Science Behind the Sweet Spot
- How to Brew Perfect Coffee Across Four Popular Methods
- Troubleshoot Your Cup: Fixing Bitterness, Sourness, and Flat Flavor
- Gear Guide: Budget-Friendly vs. Pro-Sumer Equipment
- How to Brew Perfect Coffee Sustainably: Waste, Pods, and Sourcing
- Frequently Asked Questions
Last Updated: May 20, 2026
Knowing how to brew perfect coffee at home is less about expensive equipment and more about understanding a handful of variables most guides gloss over. This guide from Cuppari Coffee covers every one of those variables, from bean freshness and grind size to water chemistry and brewing method, so you can produce a genuinely great cup every single day. Most home brewers plateau not because they lack skill but because nobody told them which variables actually matter. Below, we'll show you exactly how to fix that, method by method.
Here's what most guides get wrong: they treat coffee brewing as a sequence of steps rather than a system of interacting variables. Change one thing and everything else shifts. That's the throughline running through every section of this guide.
Why Most Home Brewers Never Quite Get It Right (And How to Fix That)
The biggest mistake home brewers make is treating each variable in isolation. Grind size, water temperature, brew ratio, and bean freshness are not independent checkboxes. They interact. A coarser grind compensates for water that's too hot. A stale bean can't be saved by perfect technique.
The good news: most problems trace back to just two or three root causes. Over-extraction produces bitterness. Under-extraction produces sourness. Flat, lifeless flavor almost always means stale beans or water that's too cold. Once you understand what each variable controls, troubleshooting becomes straightforward rather than guesswork.
Perfect coffee brewing is the practice of controlling extraction, the process by which hot water dissolves aromatic compounds, acids, sugars, and caffeine from coffee grounds, to produce a balanced cup with the right level of acidity, body, and mouthfeel.
The goal is not complexity. The goal is consistency. Once you nail the variables covered in this guide, replicating a great cup becomes a two-minute routine rather than a daily lottery.
Start With the Bean: Freshness, Roast Profiles, and Degassing
Fresh beans are not a preference. They are a prerequisite. Coffee begins releasing CO2 immediately after roasting, a process called degassing. During the first 24-48 hours post-roast, CO2 escapes so aggressively that it actually interferes with extraction. Between days 3 and 14 after roasting, most whole bean coffees hit their peak flavor window, when degassing has slowed enough for water to extract evenly.
Roast profile also shapes what you're working with. Light roasts preserve the bean's origin character: fruit-forward acidity, floral aromatics, and a lighter body. Dark roasts develop bittersweet, smoky, and chocolate notes with lower acidity but heavier mouthfeel. Neither is objectively better. The right roast profile depends on your preferred flavor and brewing method.
According to the Specialty Coffee Association's brewing resources, coffee is best consumed within 2-4 weeks of its roast date for optimal flavor, a window most grocery-store bags have already blown past by the time they reach your shelf.
Whole Bean vs. Pre-Ground: Why It Matters More Than You Think
Pre-ground coffee starts going stale within 15-30 minutes of grinding. The surface area explosion from grinding accelerates oxidation dramatically. Whole bean coffee, stored properly, retains its aromatic compounds for weeks longer.
This is not a marginal difference. It's the difference between a cup that tastes alive and one that tastes flat. Buying whole bean and grinding immediately before brewing is the single highest-return upgrade most home brewers can make.
How to Store Coffee Beans to Lock In Freshness
Store coffee beans in an airtight, opaque container at room temperature. Avoid the freezer for daily-use beans: repeated temperature cycling introduces moisture condensation that degrades flavor. Avoid direct sunlight and heat sources. A ceramic canister with a one-way CO2 valve is ideal.
Buy in smaller quantities more frequently. A 250g bag consumed within two weeks beats a 1kg bag that sits open for a month.
Cuppari Coffee roasts beans only after an order is placed and ships the same day, which means the beans arriving at your door are genuinely fresh, not weeks into their stale phase. For home brewers serious about starting with quality material, that roast-to-ship model matters.
Best Coffee Grind Size for Different Brewing Methods
Grind size controls extraction rate. Finer grinds expose more surface area to water, speeding up extraction. Coarser grinds slow it down. Matching grind size to your brewing method is non-negotiable for a balanced cup.
Here's a practical reference:
| Brewing Method | Grind Size | Texture Reference |
|---|---|---|
| Espresso | Extra fine | Powdered sugar |
| Moka pot | Fine | Table salt |
| Pour over | Medium-fine | Sand |
| Drip coffee maker | Medium | Coarse sand |
| AeroPress | Medium to fine | Varies by recipe |
| French press | Coarse | Sea salt |
| Cold brew | Extra coarse | Raw sugar |
A common mistake is using the same grind size across multiple methods. If your pour over tastes bitter, grind coarser. If it tastes sour and weak, grind finer. The grind size is your primary extraction dial.
Burr Grinder vs. Blade Grinder: Which One Actually Improves Extraction
A burr grinder crushes beans between two abrasive surfaces to produce uniform particle sizes. A blade grinder chops beans randomly, producing a mix of fine powder and coarse chunks in the same batch.
That inconsistency matters because fine particles over-extract (bitterness) while coarse particles under-extract (sourness) simultaneously. The result is a muddy, confusing cup where no amount of adjusting brew ratio or water temperature can compensate.
A burr grinder is the most impactful equipment upgrade most home brewers can make, ahead of a better kettle, better scale, or better brewer. Entry-level burr grinders from brands like Baratza or Timemore cost less than a mid-range blade grinder and produce dramatically better results.
Coffee Brewing Ratios: The Foundation of a Perfect Cup
Brew ratio is the relationship between dry coffee grounds and water, expressed as grams of coffee per grams of water. The Specialty Coffee Association's recommended starting ratio for most filter brewing methods is 1:15 to 1:17 (1 gram of coffee per 15-17 grams of water).
This is not a rigid rule. It's a starting point. Adjust based on your taste preference:
- Stronger, fuller body: move toward 1:14 or 1:13
- Lighter, more delicate cup: move toward 1:17 or 1:18
- Espresso: typically 1:2 (18g coffee to 36g espresso output)
The critical insight most guides miss: brew ratio and grind size interact. If you strengthen your ratio without adjusting grind size, you risk over-extraction. Always adjust one variable at a time.
A coffee scale is not optional for anyone serious about consistency. Measuring by volume (scoops, tablespoons) introduces variation every single time because coffee density changes with roast level and grind size. A digital scale accurate to 0.1g costs less than a specialty bag of beans and pays for itself in consistency within a week.
Water Temperature for Coffee: The Science Behind the Sweet Spot
Water temperature directly controls which compounds extract from the coffee bed and at what rate. Water that is too hot extracts bitter, harsh compounds. Water that is too cool under-extracts, leaving sourness and thin body behind.
The generally accepted optimal range for most brewing methods is 90-96°C (195-205°F). For light roasts, the higher end of that range extracts the more complex, delicate compounds that require more energy to dissolve. For dark roasts, the lower end avoids amplifying the bitterness that is already present from longer roasting. Boiling water at 100°C is too hot for most methods. A simple fix: bring water to a full boil, then let it rest off heat for 30-45 seconds before pouring.
| Roast Level | Recommended Temp | Reason |
|---|---|---|
| Light roast | 94-96°C (201-205°F) | Higher energy needed to extract delicate acids and florals |
| Medium roast | 92-94°C (198-201°F) | Balanced extraction across the flavor spectrum |
| Dark roast | 90-92°C (195-198°F) | Lower temp avoids over-amplifying roast-driven bitterness |
Advanced Water Chemistry: Why 'Use Filtered Water' Is Incomplete Advice
Every coffee guide tells you to use filtered water. Almost none of them explain what filtered water actually does, or why the wrong kind of filtered water can make your coffee worse.
Water is not just a solvent. It is an active participant in extraction. The minerals dissolved in water, specifically magnesium and calcium, act as binding agents that attract and carry aromatic compounds out of the coffee grounds and into your cup. Without them, water cannot extract coffee efficiently regardless of temperature, grind size, or technique.
This is why distilled water, which has zero dissolved minerals, produces notoriously flat, lifeless coffee even when every other variable is perfect. The extraction mechanism is broken at the chemistry level.
Magnesium vs. Calcium: They Are Not the Same
Magnesium and calcium both contribute to water hardness, but they interact with coffee differently:
- Magnesium is the more active extraction agent. It has a stronger affinity for the aromatic and acidic compounds that give coffee its brightness, complexity, and perceived sweetness. Water with higher magnesium content tends to produce more vibrant, expressive cups.
- Calcium contributes to body and mouthfeel but is a less efficient carrier of aromatic compounds. High-calcium water can produce a fuller, rounder cup but with less brightness than magnesium-dominant water.
- Sodium (present in softened water) actively suppresses bitterness perception, which sounds useful but in practice produces a flat, muted cup that lacks definition.
This is why water softeners, which replace calcium and magnesium with sodium, are particularly bad for coffee, even though the water feels cleaner and produces less limescale.
What Total Dissolved Solids (TDS) Actually Means for Your Cup
TDS measures the total concentration of all dissolved minerals in water, expressed in parts per million (ppm). The Specialty Coffee Association's water quality standards recommend a target TDS of around 150 ppm, with an acceptable range of 75-250 ppm for filter brewing.
- Below 75 ppm (very soft or filtered-to-near-zero water): Under-extracts. Flat, thin, lifeless cups. Common with ZeroWater filters, which strip minerals aggressively, and with distilled water.
- 75-250 ppm (the sweet spot): Supports full extraction. Most standard pitcher filters (Brita) leave water in this range, which is why they work reasonably well as a baseline.
- Above 250 ppm (hard tap water): Can produce chalky, muted flavors and interferes with extraction by competing with coffee compounds for binding sites. Also accelerates limescale buildup in kettles and machines.
How to Practically Adjust Your Water at Home
You do not need a chemistry degree or specialty equipment to brew with better water. Here is a practical progression:
-
Start with standard pitcher-filtered water (Brita or similar). This removes chlorine and chloramines that create off-flavors while preserving most minerals. For most tap water sources, this is sufficient.
-
If your tap water is very soft or you use a ZeroWater filter, your water is likely stripping too many minerals. Options:
- Blend filtered water with a small amount of unfiltered tap water to restore mineral content.
- Use a naturally mineral-balanced bottled water. Volvic (approximately 109 ppm TDS with a favorable magnesium-to-calcium ratio) is a commonly cited reference water in specialty coffee circles for this reason.
- Use Third Wave Water mineral packets, which are formulated specifically to hit the SCA's target mineral profile when added to distilled or near-zero water.
-
If your tap water is very hard (above 250 ppm), use a standard pitcher filter as a first pass. If the water is still above 200 ppm after filtering, blending with a small proportion of distilled water brings it into range.
-
If you have a water softener, bypass it for your coffee water entirely. Sodium-softened water is one of the worst inputs for coffee extraction and is the hidden reason many home brewers with otherwise good setups cannot get a bright, expressive cup.
A Note on Kettle Temperature Control
A temperature-controlled gooseneck kettle (Fellow Stagg EKG, Brewista, or similar) eliminates the guesswork of the 30-second rest method and holds water at a precise temperature throughout a pour over. For pour over and AeroPress brewing, where pour rate and temperature consistency both matter, a variable-temperature kettle is a meaningful upgrade. For French press and drip brewing, where you pour all at once or the machine controls temperature, it is a convenience rather than a necessity. Prioritize it after you have addressed grind quality and water mineral content.
How to Brew Perfect Coffee Across Four Popular Methods
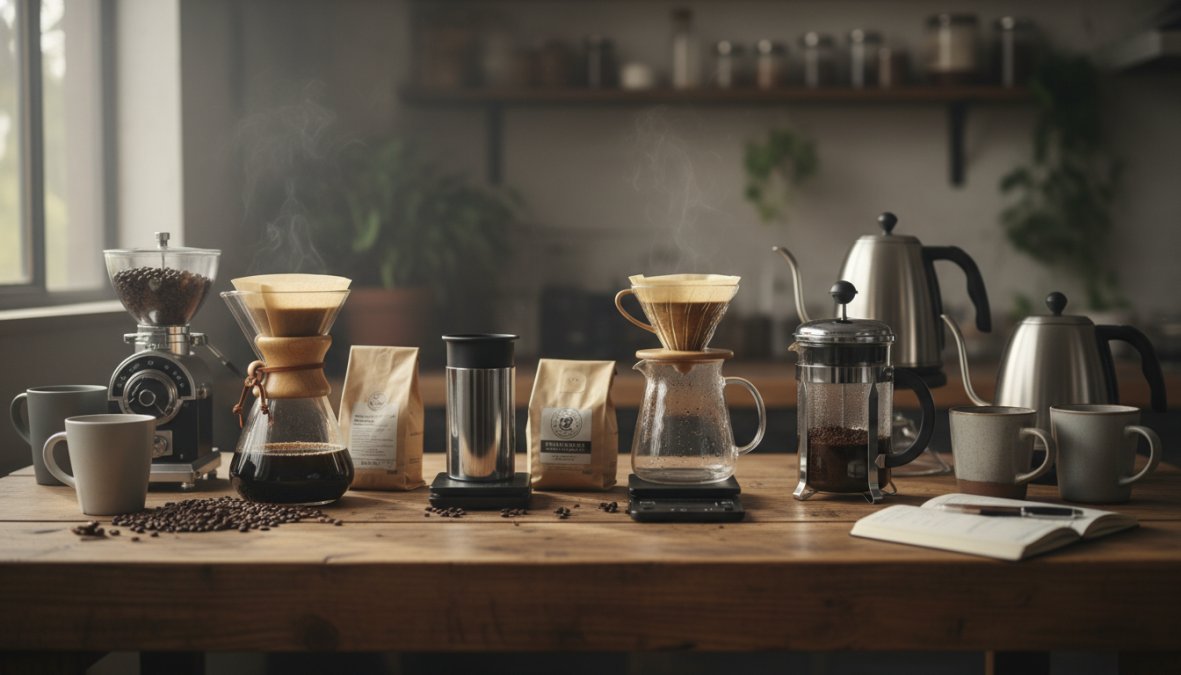
The method you choose shapes the fundamental character of your cup. Percolation methods (pour over, drip) produce clarity and brightness. Immersion methods (French press, AeroPress) produce fuller body and heavier mouthfeel. Neither is superior; they're different tools for different flavor goals.
Pour Over: Precision and Clarity in Every Cup
Pour over brewing produces the clearest, most transparent expression of a coffee's origin character. It's the method baristas reach for when they want to showcase a high-quality single origin bean.
What you need: Dripper (Hario V60, Chemex, Kalita Wave), paper filter, kettle, scale, timer.
Steps:
- Heat water to 93-96°C (200-205°F).
- Rinse the paper filter with hot water to remove papery taste and preheat the dripper.
- Add medium-fine ground coffee at a 1:15 ratio.
- Start the bloom: pour 2x the coffee weight in water (e.g., 30g water for 15g coffee) and wait 30-45 seconds. This releases CO2 from fresh beans and ensures even saturation.
- Pour the remaining water in slow, concentric spirals, keeping the coffee bed level.
- Total brew time: 2:30-3:30 minutes.
The bloom is the step most home brewers skip. Skipping it with freshly roasted whole bean coffee produces uneven extraction because trapped CO2 repels water from parts of the coffee bed.
French Press: Full-Body Immersion Brewing at Home
French press is the most forgiving brewing method for beginners and produces the heaviest body of any common home brewing approach. The metal mesh filter allows oils and fine particles through, which creates that characteristic richness.
Steps:
- Heat water to 92-95°C (198-203°F).
- Add coarsely ground coffee at a 1:15 ratio.
- Pour all water at once and stir gently.
- Place the lid on (plunger up) and steep for 4 minutes.
- Press the plunger down slowly and pour immediately. Do not let coffee sit on the grounds after brewing or it will over-extract.
The real difference between a good and a bad French press cup comes down to grind coarseness and not over-steeping. Most people grind too fine and leave it sitting too long.
Drip Coffee Maker: Consistency for Everyday Brewing
A quality drip coffee maker automates the pour over process. The best machines (Technivorm Moccamaster, Breville Precision Brewer) maintain water temperature within the optimal range and distribute water evenly across the coffee bed.
For everyday brewing, drip offers the best balance of consistency and convenience. Use a medium grind, a 1:15-1:17 ratio, and filtered water. Clean the machine monthly (see the maintenance section below).
The thing nobody tells you about drip coffee: most budget machines brew at temperatures well below the optimal range, which is why the coffee tastes weak and flat even with good beans. A machine that hits 93°C+ is worth the investment.
AeroPress and Moka Pot: Compact Brewers Worth Knowing
The AeroPress is the most versatile brewer in this guide. It combines immersion brewing with pressure-assisted percolation, producing a concentrate that can be diluted to taste. Brew time is under two minutes, cleanup is 30 seconds, and the margin for error is low. It's the ideal travel brewer and a genuine favorite among specialty coffee enthusiasts.
The moka pot brews espresso-style coffee using stovetop steam pressure. It doesn't produce true espresso (the pressure is far lower than a pump machine), but it makes a rich, concentrated brew that works well with milk-based drinks. Use a fine grind, medium heat, and remove from heat the moment you hear the characteristic gurgling sound to avoid burning the coffee.
Troubleshoot Your Cup: Fixing Bitterness, Sourness, and Flat Flavor
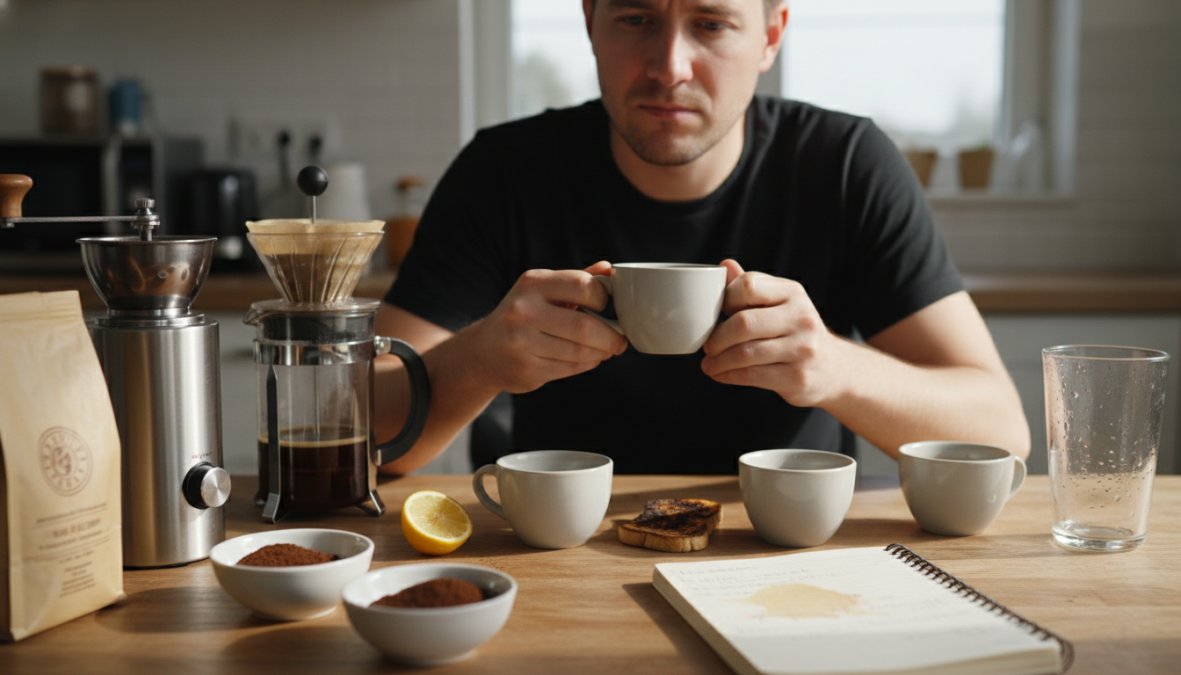
What separates an experienced home brewer from a frustrated one is not knowing the right recipe, it's knowing how to read a bad cup and trace the problem back to its root cause. Most guides hand you a table of symptoms and fixes. What they skip is the tasting protocol that tells you which row of that table you're actually in.
Here is how to diagnose your cup before you touch a single variable.
Step 1: Locate Where the Flavor Hits on Your Palate
Extraction problems have a physical geography in your mouth. This is the fastest diagnostic shortcut available to you.
- Sourness and sharp acidity register on the sides and tip of your tongue, early in the sip. If the unpleasant sensation arrives immediately and fades fast, you are under-extracted. The water did not dissolve enough of the coffee's sugars and heavier compounds to balance the acids that extract first.
- Bitterness registers at the back of your tongue and lingers after you swallow. If the finish is long, dry, and harsh, you are over-extracted. The water dissolved the desirable compounds and kept going into the harsher, astringent ones.
- Flatness with no clear acidity or bitterness is not an extraction problem, it is a freshness or water problem. The compounds were never there to extract in the first place.
If you can locate the sensation, you can name the problem. If you can name the problem, you know exactly which variable to move.
Step 2: Match the Sensation to Its Cause
| What You Taste | Where You Feel It | Root Cause | Primary Fix | Secondary Fix |
|---|---|---|---|---|
| Sharp, sour, thin | Tip and sides of tongue, early | Under-extraction | Grind finer | Raise water temp or extend brew time |
| Bitter, dry, harsh | Back of tongue, lingers | Over-extraction | Grind coarser | Lower water temp or shorten brew time |
| Flat, papery, lifeless | Everywhere, no brightness | Stale beans or mineral-poor water | Fresher beans | Add mineral content to water |
| Watery, weak body | Thin mouthfeel throughout | Ratio too low | Increase coffee dose | , |
| Muddy, gritty, confused | Simultaneous sour and bitter | Uneven grind (blade grinder) | Switch to burr grinder | Coarsen grind to reduce fines |
| Astringent, drying | Cheeks and gums pucker | Severe over-extraction or very fine fines | Coarsen grind significantly | Check water temp is not above 96°C |
The Simultaneous Sour-and-Bitter Problem
The most confusing cup to diagnose is one that tastes both sour and bitter at the same time. This is almost always a grind uniformity problem, not an extraction problem. A blade grinder, or a worn burr grinder, produces a wide range of particle sizes in a single dose. The fine particles over-extract (bitterness) while the coarse particles under-extract (sourness) in the same brew. No adjustment to temperature, ratio, or time can fix this because the problem is happening simultaneously at opposite ends of the extraction spectrum.
The fix is not a recipe change. The fix is a grinder change.
How to Adjust One Variable at a Time
The cardinal rule of troubleshooting is to change exactly one variable per brew session. This sounds obvious. Almost nobody does it.
A practical protocol:
- Brew your normal cup. Taste it deliberately using the palate map above.
- Name the primary problem (sour, bitter, flat, weak, muddy).
- Identify the single most likely cause from the table.
- Make one adjustment, typically grind size first, because it has the largest effect on extraction rate.
- Brew again with everything else identical.
- Taste again. Did the problem move in the right direction? If yes, continue adjusting in the same direction in smaller increments. If no, the cause is elsewhere, move to the secondary fix.
Grind size is almost always the right first variable to adjust because it has the largest leverage on extraction rate. Water temperature is the second lever. Brew time is the third. Ratio adjustments change strength and body but do not fix extraction balance, do not use them as a substitute for fixing grind or temperature.
Diagnosing Flat Coffee: The Freshness vs. Water Test
Flat, lifeless coffee with no brightness and no bitterness is the hardest problem to fix because it has two completely different root causes that require different solutions.
Test 1: The bloom test. When you pour your bloom water (2x coffee weight), do you see vigorous bubbling and doming of the coffee bed? Active CO2 release means the beans are fresh enough to extract well. No bloom, or a weak one, means the beans are stale. No recipe adjustment will fix stale beans.
Test 2: The water swap test. If your beans are genuinely fresh (within two weeks of roast date, whole bean, ground immediately before brewing) and the cup is still flat, swap your water source. Brew one cup with your normal water and one cup with a known mineral-balanced water (Volvic, or tap water with a Third Wave Water tablet). If the second cup has noticeably more brightness and body, your water is the problem, not your technique.
According to the Specialty Coffee Association's brewing resources, the ideal extraction yield for filter coffee sits between 18% and 22% of the coffee's dry weight. Under 18% produces sourness; over 22% produces bitterness. A refractometer can measure this precisely for those who want to move beyond palate-only diagnosis, but the tasting framework above is a reliable guide once you have practiced it across a few brew sessions.
Gear Guide: Budget-Friendly vs. Pro-Sumer Equipment
You do not need to spend a lot of money to brew excellent coffee. But knowing where spending more actually matters versus where it doesn't is the difference between a smart setup and an expensive one.
| Category | Budget Pick | Pro-Sumer Pick | Where It Matters |
|---|---|---|---|
| Grinder | Timemore C2 (~$50) | Baratza Encore ESP (~$195) | High impact |
| Kettle | Basic gooseneck (~$25) | Fellow Stagg EKG (~$165) | Medium impact |
| Scale | AWS pocket scale (~$15) | Acaia Pearl (~$150) | Low impact (any 0.1g scale works) |
| Brewer | Hario V60 (~$15) | Chemex 6-cup (~$45) | Low impact |
| Coffee | Fresh whole bean | Cuppari Coffee subscription | High impact |
The honest take: spend your money on the grinder and the beans. A $50 burr grinder with freshly roasted beans from a quality roaster beats a $200 brewer with stale pre-ground coffee every time.
Pro-sumer gear matters when you've already optimized the fundamentals and want to reduce the last variables. A temperature-controlled kettle eliminates one variable. A high-precision scale eliminates another. But neither helps if you're starting with stale beans and a blade grinder.
Equipment Cleaning and Maintenance: The Step Most Brewers Skip
Coffee oils go rancid. Mineral deposits from water build up in heating elements. Both degrade cup quality silently over weeks, making you think your beans or technique are the problem when the real issue is a dirty machine.
Minimum maintenance schedule:
- Daily: Rinse brewer, portafilter, and grinder catch tray with hot water.
- Weekly: Wash removable parts with mild dish soap. Brush grinder burrs with a stiff brush.
- Monthly: Descale your kettle and drip machine with a citric acid solution or commercial descaler.
- Every 3-6 months: Deep clean your grinder with grinder-cleaning tablets (Grindz or similar).
A clean machine is not optional. Rancid coffee oils in a grinder affect every subsequent cup. This is the maintenance step most brewers skip, and it's often the hidden reason their coffee quality plateaus.
How to Brew Perfect Coffee Sustainably: Waste, Pods, and Sourcing
Sustainability in coffee covers three areas: what you buy, how you brew, and what you discard.
Sourcing: Single origin coffees with direct trade or Rainforest Alliance certification signal better traceability and fairer producer compensation. A coffee subscription that sources transparently, like Cuppari Coffee's direct-to-door model, also reduces the supply chain steps that contribute to carbon footprint.
Brewing waste: French press and pour over produce minimal waste (spent grounds, a paper filter). Drip machines are similar. Single-use plastic pods are the most wasteful format, generating significant plastic waste per cup. If convenience is the priority, look for certified compostable pods or reusable pod systems. Cuppari Coffee's pod format uses sealed capsules designed to preserve freshness, and choosing a reusable capsule adapter eliminates the single-use waste entirely.
Coffee grounds: Spent grounds are nitrogen-rich. They make excellent compost additions, garden fertilizer, or natural deodorizers. Diverting them from landfill is the simplest sustainability step most home brewers can take immediately.
Water: Brewing coffee uses roughly 200ml of water per cup, but coffee production is water-intensive at origin. Buying certified beans from farms with water stewardship practices addresses the larger footprint.
According to the International Coffee Organization's sustainability reporting, the coffee sector is actively developing standards for environmental traceability from farm to cup. Choosing roasters who publish sourcing information puts consumer pressure on that supply chain.
The hardest part of brewing great coffee at home is not learning the technique. It's starting with beans that are actually fresh enough to reward good technique. Cuppari Coffee solves that problem directly: beans are roasted only after your order is placed and shipped the same day, so the coffee arriving at your door is genuinely within its peak flavor window. With free shipping on all U.S. orders and options ranging from single origin to blends and pods, there's no reason to keep brewing with stale beans. Add to cart and taste the difference a fresh roast actually makes.
Frequently Asked Questions
What is the golden ratio for brewing coffee?
The most widely recommended coffee brewing ratio is 1:15 to 1:17, meaning 1 gram of coffee for every 15 to 17 grams of water. For a standard 12-ounce mug, that works out to roughly 20-22 grams of coffee. Using a coffee scale rather than a scoop gives you far more consistency. Adjusting your brew ratio is also one of the easiest ways to dial in body and strength without changing your grind size or water temperature.
Does water temperature affect coffee taste?
Yes, water temperature for coffee has a direct impact on extraction. Water that is too hot (above 205°F / 96°C) tends to over-extract, pulling bitter compounds from the coffee grounds. Water that is too cool under-extracts, leaving the cup sour and thin. The generally accepted sweet spot is between 195°F and 205°F (90-96°C). If you don't have a thermometer, letting boiling water rest for 30-45 seconds usually brings it into the right range.
How does grind size impact coffee extraction?
Grind size controls the surface area of your coffee grounds exposed to water, which directly affects extraction speed and flavor. A finer grind increases surface area, speeding up extraction, ideal for espresso or AeroPress. A coarser grind slows extraction, which suits French press or cold brew. Using the wrong grind size for your method is one of the most common causes of bitter or sour coffee. A burr grinder produces a more uniform grind than a blade grinder, giving you better, more repeatable results.
What is the best way to store coffee beans for freshness?
To store coffee beans properly, keep them in an airtight, opaque container away from heat, light, and moisture. Avoid the refrigerator, condensation introduces moisture that degrades flavor. A cool, dark pantry shelf is ideal. Whole beans stay fresh for two to four weeks after roasting. Buying from a roaster that ships beans roasted-to-order, like a coffee subscription service, means your beans arrive at peak freshness rather than sitting in a warehouse for weeks before purchase.
How long should coffee bloom before brewing?
The bloom phase, where you pre-wet your coffee grounds with a small amount of hot water before the full pour, should last about 30 to 45 seconds. During this time, CO2 released through degassing escapes the coffee bed, allowing water to extract aromatic compounds more evenly in the main brew. Fresher beans produce a more vigorous bloom with visible bubbling. If your coffee barely blooms, it may be stale. A proper bloom noticeably improves clarity, sweetness, and overall balance in pour over and drip methods.
Is filtered water better for brewing coffee?
Yes, filtered water generally produces a noticeably better cup. Tap water with high chlorine content or very high total dissolved solids (TDS) can mute delicate aromatic compounds and introduce off-flavors. Ideally, brewing water should have a TDS between 75-150 ppm and a neutral to slightly alkaline pH. Filtered water, whether from a pitcher, under-sink filter, or bottled spring water, hits that range more reliably than most municipal tap water, helping you brew perfect coffee without chemistry interference.
This article was written using GrandRanker