

Table of Contents
- Start With the Best Coffee Beans for Home Brewing
- Invest in Essential Home Barista Tools
- Master the Coffee to Water Ratio
- How to Froth Milk at Home Like a Barista
- Get Water Temperature and Quality Right
- Execute the Brewing Process to Make Coffee Taste Like a Cafe
- Common Mistakes to Avoid
- Conclusion
Last Updated: June 19, 2026
Knowing how to make coffee taste like a cafe at home is easier than most people assume. The gap between your morning cup and a barista-crafted one usually comes down to a handful of fixable variables. This guide covers every step of the process, from bean selection to milk texturing, so you can stop overpaying for coffee shop visits and start brewing something genuinely excellent at home. The first insight might surprise you: the biggest problem isn't your equipment. Most home brewers blame their machine. The real culprit is almost always the beans.
Start With the Best Coffee Beans for Home Brewing
The best coffee beans for home brewing are freshly roasted, origin-specific, and matched to your preferred flavor profile. Beans sitting on a grocery store shelf for months have undergone significant oxidation, stripping the nuanced flavors that make cafe coffee worth paying for.
Why Freshly Roasted Beans Matter
Freshly roasted beans are the single highest-impact variable in home brewing. Coffee reaches peak flavor between 3 and 14 days after roasting. After that window, stale flavors dominate: flat, papery, or hollow cups that no amount of technique can fix. Roast date matters more than brew method.
Understanding Coffee Origin and Flavor Profile
Coffee origin is a direct indicator of flavor profile, acidity, body, and mouthfeel before a single brewing decision is made.
- Ethiopian single origin: Bright acidity, floral and fruity notes, light to medium body. Best for pour-over and light roast brewing.
- Colombian blends: Balanced acidity, caramel sweetness, medium body. Versatile across brew methods.
- Sumatran beans: Low acidity, earthy and full-bodied. Well-suited to espresso and dark roast profiles.
- Brazilian beans: Nutty, chocolatey, low acidity. Common base for espresso blends.
Processing method also shapes flavor. Washed (wet-processed) coffees tend toward clarity and brightness. Natural (dry-processed) coffees produce fruit-forward, wine-like complexity. Honey-processed beans sit between the two.
Invest in Essential Home Barista Tools
Essential home barista tools don't need to be expensive, but they do need to be precise. The two non-negotiable pieces of equipment are a burr grinder and a digital scale.
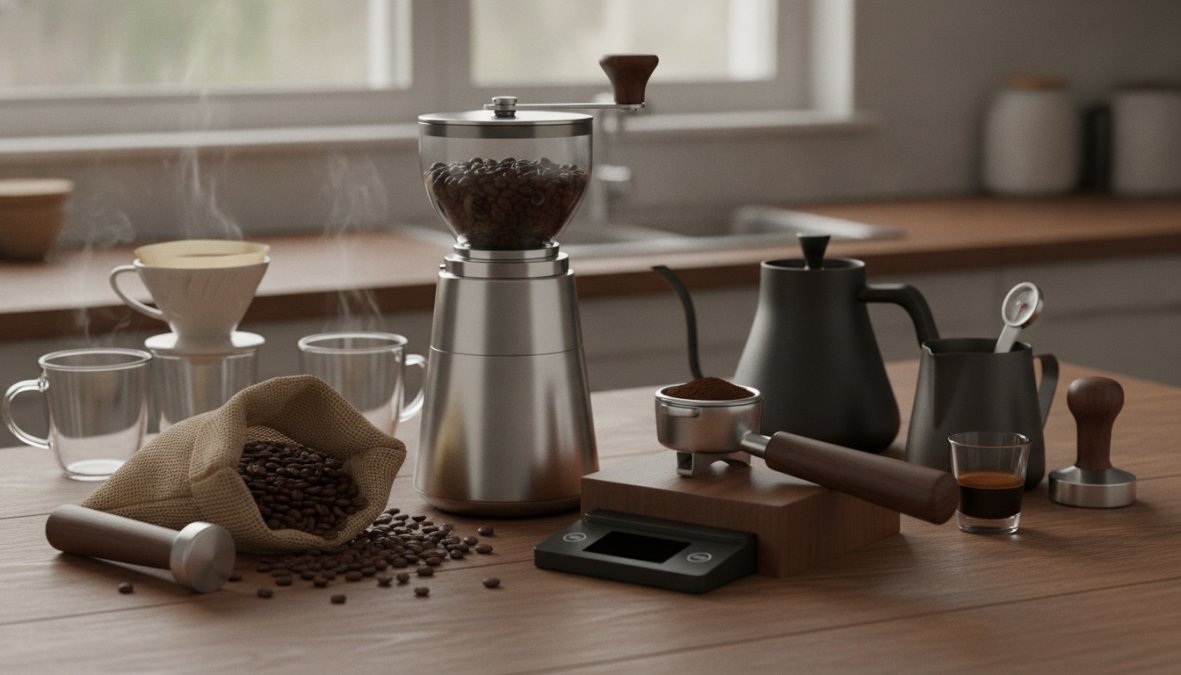
Burr Grinder for Grind Consistency
A burr grinder produces uniform particle size, the foundation of even extraction. Blade grinders chop beans randomly, creating a mix of fine powder and large chunks that extract at different rates, producing cups that are simultaneously bitter and sour.
Conical burr grinders work well for most brew methods. Flat burr grinders produce slightly more uniform grinds and are preferred for espresso, though they cost more. For most home brewers, a quality conical burr grinder in the mid-range price tier is the right choice.
Scale, Kettle, and Brewing Equipment
A digital scale accurate to 0.1 grams removes guesswork from your coffee-to-water ratio. A gooseneck kettle gives you control over pour rate and direction, which matters significantly for pour-over brewing. These two tools cost less than a week of daily cafe visits and have an outsized impact on cup quality.
A standard kitchen scale works for most brew methods. A standard electric kettle with a thermometer works fine; a gooseneck kettle is an upgrade, not a requirement, for drip coffee. French press, Aeropress, and Moka pot are all capable of cafe-quality results without expensive machinery.
Master the Coffee to Water Ratio
The coffee-to-water ratio is the most controllable variable in brewing and the one most home brewers eyeball instead of measure.
Standard Ratios for Different Brew Methods
The Specialty Coffee Association recommends a starting ratio of 1:15 to 1:17 (coffee to water by weight) for most filter brewing methods, according to Specialty Coffee Association brewing standards.
| Brew Method | Coffee (g) | Water (ml) | Ratio |
|---|---|---|---|
| Pour-over | 20g | 300ml | 1:15 |
| French press | 30g | 500ml | 1:17 |
| Espresso | 18g | 36ml | 1:2 |
| Drip coffee | 60g | 1000ml | 1:17 |
| Aeropress | 15g | 200ml | 1:13 |
Adjust based on taste preference: stronger cup, decrease the ratio (more coffee); lighter cup, increase it.
Using a Scale for Precision
Measuring by weight rather than volume eliminates inconsistency. A tablespoon of finely ground coffee weighs significantly more than a tablespoon of coarsely ground coffee. Weigh your coffee before grinding and your water before brewing for noticeably more consistent results.
How to Froth Milk at Home Like a Barista
Learning how to froth milk at home is one of the most satisfying upgrades in the home brewing process. Barista-style micro-foam is achievable without a commercial espresso machine.
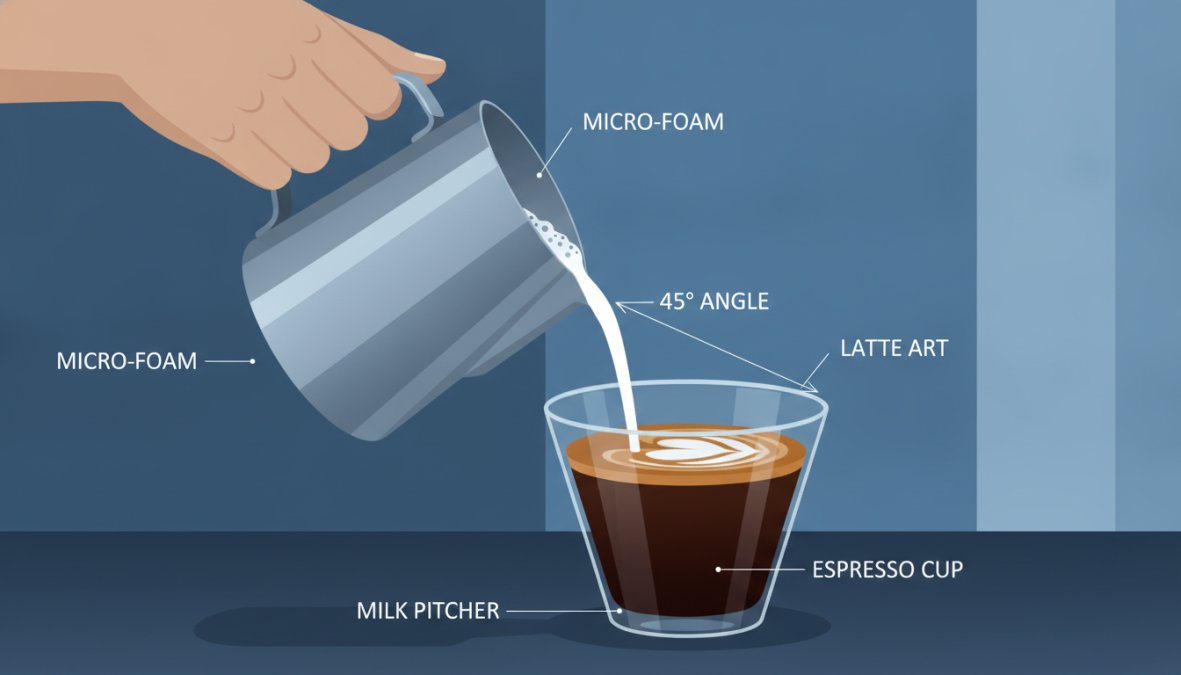
Techniques for Micro-Foam Without a Machine
Micro-foam is finely textured steamed milk with a glossy, paint-like consistency that integrates with espresso rather than sitting on top of it.
Three methods that work at home:
- French press frothing: Heat milk to around 60-65°C, pour into a French press, and pump the plunger rapidly for 30-45 seconds.
- Handheld milk frother: An electric whisk-style frother creates lighter, airier foam in under a minute.
- Mason jar method: Fill a jar halfway with warm milk, seal it, shake vigorously for 30-45 seconds, then microwave for 20 seconds to stabilize the foam.
Milk Selection and Texture Control
Whole milk produces the best micro-foam because of its fat content and protein structure. Oat milk is the most capable non-dairy alternative. Almond milk tends to produce thin, unstable foam.
Temperature matters: milk heated above 70°C loses its sweetness and takes on a scalded flavor. Aim for 60-65°C for the best flavor and texture.
Get Water Temperature and Quality Right
Water quality is the variable most home brewers never think about, and it's responsible for a significant portion of the flavor difference between home coffee and cafe coffee.
Optimal Brewing Temperature for Extraction
The ideal brewing temperature for most coffee extraction is between 90°C and 96°C (195°F to 205°F). Water below this range under-extracts, producing sour, weak coffee. Water above this range over-extracts, pulling harsh bitter compounds from the grounds.
Boiling water sits at 100°C. If you're pouring straight from a boil, let it rest for 30-45 seconds before brewing. For espresso, most machines operate in this range automatically. For manual methods like pour-over, a kettle with a built-in thermometer removes the guesswork.
Filtered Water and Total Dissolved Solids
Total dissolved solids (TDS) refers to the mineral content of your water. The optimal TDS range for brewing coffee is generally between 75 and 250 parts per million (ppm). A standard carbon filter (like a Brita) removes chlorine and off-flavors while preserving enough mineral content for good extraction. Hard tap water is one of the most underestimated sources of bad coffee, and a basic filter fixes it for almost nothing.
Execute the Brewing Process to Make Coffee Taste Like a Cafe
Here's where everything comes together. Executing the brew process with attention to the bloom phase, agitation, and brew time produces cafe-quality results.
The Bloom Phase and Agitation
The bloom phase is the 30-45 second pre-infusion step at the start of pour-over and drip brewing. Pour twice the weight of water as coffee (for 20g of coffee, pour 40ml of water) and allow the grounds to degas. Fresh beans release significant CO2, and the bloom allows this gas to escape before full extraction begins.
Skipping the bloom produces uneven extraction because CO2 creates channels in the coffee bed that water flows through unevenly. Agitation, gentle stirring or swirling of the coffee bed during brewing, promotes even saturation and extraction. A gentle stir at the start of the bloom and once more during the main pour is usually sufficient.
Brew Time and Pour-Over Technique
Target brew times by method:
- Pour-over (V60, Chemex): 3 to 4 minutes total
- French press: 4 minutes steep time
- Aeropress: 1.5 to 2.5 minutes depending on recipe
- Espresso: 25 to 35 seconds for the shot itself
For pour-over specifically, pour in slow, concentric circles starting from the center and moving outward. This ensures even saturation across the entire coffee bed. Pouring too fast or in one spot creates channeling, where water finds the path of least resistance rather than extracting evenly.
Common Mistakes to Avoid
Most home brewing failures trace back to the same handful of mistakes.
Stale Beans and Improper Storage
Stale beans are the most common and most fixable problem. Coffee goes stale through oxidation, and the rate accelerates after grinding. Grind fresh for every brew. Store whole beans in an airtight, opaque container away from heat and light. A ceramic canister with a one-way CO2 valve is the best storage option. Avoid clear glass jars, and never store beans in the freezer unless buying in very large quantities.
Equipment Maintenance and Cleaning
Coffee oils accumulate in grinders, carafes, and brewers and go rancid, contributing bitter, stale flavors to every subsequent cup. Clean your grinder weekly, your carafe and brewer after every use, and descale your kettle monthly if you're in a hard water area. Hot water rinses are sufficient for daily cleaning; avoid dish soap residue.
Troubleshooting Flavor Profiles
| Flavor Problem | Likely Cause | Fix |
|---|---|---|
| Sour / sharp | Under-extraction | Finer grind, higher temp, longer brew time |
| Bitter / harsh | Over-extraction | Coarser grind, lower temp, shorter brew time |
| Flat / weak | Stale beans or low ratio | Fresh beans, increase coffee dose |
| Watery | Too coarse or too little coffee | Finer grind or increase ratio |
| Papery | Unrinsed filter or old beans | Pre-rinse filter, use fresher beans |
Change one variable at a time and taste the result before adjusting further.
The biggest obstacle to cafe-quality coffee at home isn't skill or equipment. It's starting with beans that have already lost their best qualities before they reach your cup. With fresh beans, the right tools, and attention to the variables that matter most, you can brew coffee at home that rivals any cafe.
Frequently Asked Questions
Why does cafe coffee taste better than home coffee?
Cafe coffee tastes superior due to several factors: freshly roasted beans with optimal extraction, precise water temperature control, proper grind consistency, and barista-level technique including bloom phases and precise coffee-to-water ratios. Cafes also use filtered water with controlled total dissolved solids and maintain equipment meticulously. At home, stale beans, inconsistent grind size, and skipped steps like blooming are common culprits. Using freshly roasted beans delivered fresh and mastering these techniques bridges the gap significantly.
What's the ideal coffee to water ratio for cafe-style brewing?
The standard coffee to water ratio is 1:16 (one part coffee to sixteen parts water) for most brew methods like pour-over and drip coffee. For espresso, use a 1:2 ratio (input to output). These ratios ensure proper extraction and balanced flavor profile. Using a digital scale eliminates guesswork, measure both coffee and water by weight, not volume. Light roasts may benefit from slightly hotter water (200-205°F), while darker roasts work well at 195-200°F. Adjust ratios by 0.5g increments if your coffee tastes too bitter or too sour.
How can I froth milk at home without an espresso machine?
You can create micro-foam using several budget-friendly methods: a handheld milk frother (under $20), a French press, or a mason jar. For the jar method, heat milk to 150-155°F, pour into a sealed jar, shake vigorously for 30-60 seconds until foam forms, then let it settle. For a French press, heat milk, pour into the press, and pump the plunger rapidly 10-15 times. The key is incorporating air while heating. Whole milk froths better than skim due to fat content. Practice the angle and timing to achieve the silky micro-foam texture that defines barista-style drinks.
How important is freshness when selecting the best coffee beans for home brewing?
Freshness is critical, beans begin oxidizing immediately after roasting and lose flavor compounds within 2-4 weeks. The best coffee beans for home brewing are roasted within days of purchase. Look for a roast date on packaging, not just an expiration date. Whole beans stay fresher longer than pre-ground coffee. Store beans in an airtight ceramic canister away from light, heat, and moisture to preserve acidity, body, and mouthfeel. Coffee origin and processing method also affect flavor, but stale beans from any origin will taste flat and dull compared to fresh, properly stored beans.
This article was written using GrandRanker