

Table of Contents
- Why Coffee Mold Is a Real Problem (Not Just a Marketing Myth)
- Signs of Moldy Coffee Beans You Should Never Ignore
- Is Moldy Coffee Dangerous? What the Science Actually Says
- How to Prevent Coffee Mold Through Proper Bean Storage
- Best Coffee Storage Containers to Keep Mold Away
- How to Clean Coffee Maker Mold: Equipment Maintenance Protocols
- How to Prevent Coffee Mold at the Source: Sourcing and Quality Control
- Conclusion
Last Updated: May 31, 2026
Mold in coffee is more common than most drinkers realize, and knowing how to prevent coffee mold is one of the most overlooked aspects of getting a genuinely clean, safe cup. This guide from Cuppari Coffee covers everything from the science of mycotoxins to equipment hygiene protocols that most articles completely skip. The stakes are real: mold spores can colonize coffee beans at any stage of the supply chain, from harvesting through home storage, and some of the toxins they produce are heat-stable enough to survive roasting.
Here's what most guides get wrong: they treat mold prevention as a storage problem alone. It's not. It's a sourcing problem, a processing problem, an equipment problem, and yes, a storage problem. Below, we'll cover all four angles with specific, actionable steps you can apply today.
Why Coffee Mold Is a Real Problem (Not Just a Marketing Myth)
Mold-free coffee has become a marketing term, but the underlying concern is legitimate science. Fungi thrive in the warm, humid conditions that coffee beans encounter during harvesting, drying, and transport. Once mold spores establish themselves on coffee beans, they can produce chemical byproducts called mycotoxins that don't simply wash or roast away.
The mold narrative gets weaponized by brands selling "clean coffee" at premium prices, which has made some consumers dismiss the concern entirely. That's the wrong conclusion. The correct takeaway is that mold risk is real but manageable, and you don't need to spend a fortune to address it.
Understanding Mycotoxins: Aflatoxin and Ochratoxin A
Mycotoxins are toxic compounds produced by certain species of fungi that contaminate food and agricultural products, including coffee beans. Two mycotoxins are particularly relevant to coffee: aflatoxin and ochratoxin A.
Aflatoxin is produced primarily by Aspergillus fungi and is classified as a Group 1 carcinogen by the International Agency for Research on Cancer. Ochratoxin A is produced by both Aspergillus and Penicillium species and has been associated with kidney toxicity in animal studies. According to the European Food Safety Authority's assessments on ochratoxin A in food, ochratoxin A is among the more frequently detected mycotoxins in coffee products across European markets.
The critical point: these toxins are not destroyed by caffeine, and they are only partially reduced by the roasting process. High-temperature roasting does degrade some ochratoxin A, but the reduction is inconsistent and depends heavily on roast duration and temperature.
How Mold Spores Get Into Coffee Beans
Mold spores enter the coffee supply chain at multiple points. During harvesting, damaged or overripe cherries are especially vulnerable because the fruit pulp creates a moist, sugar-rich environment where fungi proliferate. Wet processing methods, where beans are fermented in water before drying, carry additional contamination risk if fermentation tanks aren't properly cleaned.
The drying stage is the single biggest vulnerability. Beans dried on the ground, in direct contact with soil, or in humid conditions without adequate airflow are at the highest risk. Improper storage during shipping, particularly in containers with fluctuating temperatures and humidity, allows mold to spread even on beans that started clean.
Signs of Moldy Coffee Beans You Should Never Ignore
Identifying signs of moldy coffee beans early protects both your health and the quality of your brew. Mold on coffee beans doesn't always look dramatic, which is why many drinkers miss it entirely.
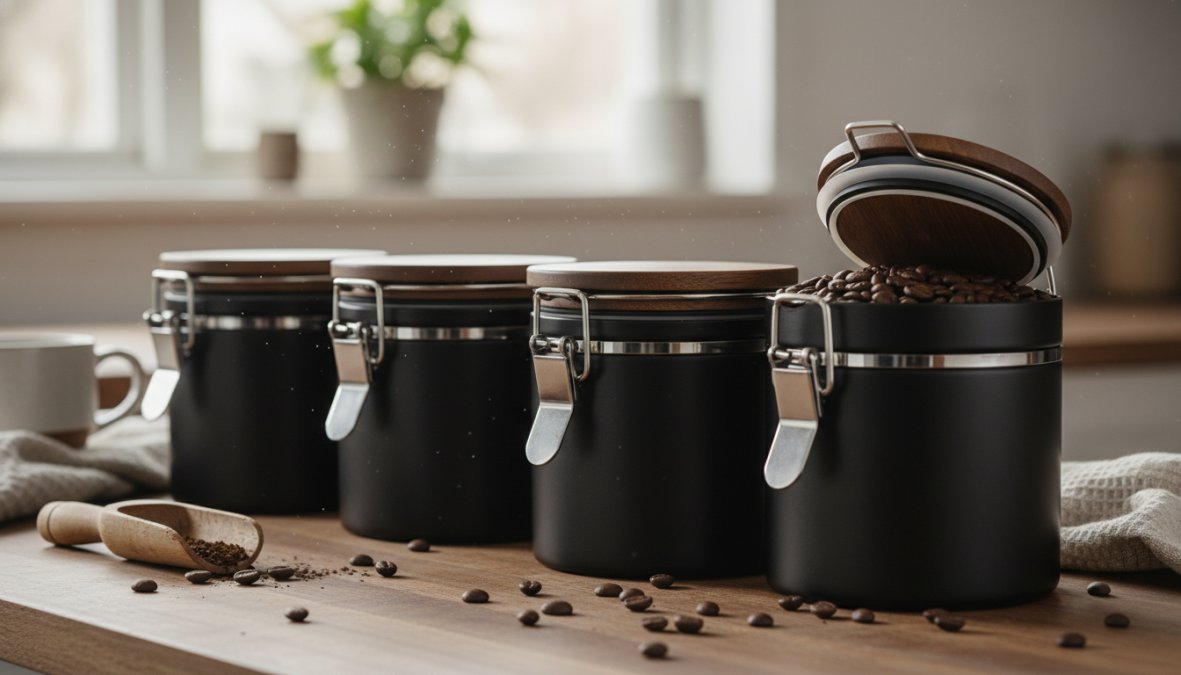
Visual Identification Guide: What Mold on Coffee Looks Like
Visible mold on coffee beans typically presents as:
- White or grayish fuzzy patches on the surface of individual beans, often appearing in clusters
- Greenish or bluish-green discoloration, which suggests Penicillium or Aspergillus contamination
- Unusual dark spotting that differs from normal roast coloration, especially on lighter roasted beans
- Clumping of beans, where moisture has caused beans to stick together, creating ideal mold conditions
- A musty, earthy, or damp basement smell rather than the expected roasted or fruity aroma
Pre-ground coffee is harder to inspect visually because the surface area is fragmented. A musty or sour smell in ground coffee that isn't explained by the roast profile is a red flag worth taking seriously.
Is Moldy Coffee Dangerous? What the Science Actually Says
Moldy coffee is dangerous primarily because of mycotoxin contamination rather than the mold itself. Consuming mold spores in small quantities is generally not acutely harmful for healthy adults, but mycotoxins are a different category of concern entirely.
Ochratoxin A and aflatoxin are both regulated in food products across the European Union and many other markets. Regulatory agencies set maximum permissible levels because even low-level chronic exposure carries documented health risks. The key word is chronic: a single cup of coffee with trace mycotoxins is unlikely to cause acute harm, but regular consumption of contaminated coffee over months or years is a different calculation.
As documented in the FDA's guidance on mycotoxins in food, aflatoxin is among the most potent naturally occurring carcinogens known, and the FDA enforces strict action levels for aflatoxin in food commodities. Coffee isn't exempt from this scrutiny.
The contrarian insight worth stating plainly: premium price does not equal mold-free. Some expensive single-origin coffees are processed using methods that increase mold risk, while some mass-market roasters source from suppliers with rigorous quality control. Price is a weak proxy for safety here.
How to Prevent Coffee Mold Through Proper Bean Storage
Proper bean storage is the most direct action a home coffee drinker can take to prevent coffee mold after purchase. The goal is to eliminate the three conditions mold needs to grow: moisture, warmth, and oxygen.
Follow these steps for effective home storage:
- Transfer beans immediately from paper bags to an airtight container upon arrival. Paper bags, even those with one-way valves, are not sufficient for long-term storage.
- Store at room temperature, away from heat sources like ovens, dishwashers, and direct sunlight. Refrigerators introduce humidity through condensation when the container is opened.
- Keep the container in a dark location. Light accelerates oxidation of coffee oils, which degrades freshness and can create conditions that favor mold.
- Buy in quantities you'll consume within two to three weeks. Shelf life management is the simplest mold prevention strategy most people ignore.
- Never return unused ground coffee to the original bag after exposure to air. Contamination risk increases with each exposure.
The Role of Humidity and Temperature in Mold Growth
Humidity and temperature are the two primary environmental drivers of mold growth on coffee beans. Mold spores are present in most environments, but they require moisture content above a certain threshold to germinate and colonize.
Coffee beans stored in environments with relative humidity above 70% are at significant risk. Temperature fluctuations are particularly damaging because they cause condensation inside storage containers, introducing exactly the moisture that mold needs. Stable, cool, dry conditions are the target.
According to USDA guidelines on moisture management in stored commodities, moisture content in stored agricultural products is the single most controllable variable in preventing fungal contamination. For coffee, keeping beans at a water activity level below 0.70 is the practical standard for safe storage.
Whole Bean vs. Pre-Ground: Which Is Safer from Mold?
Whole bean coffee is meaningfully safer from mold than pre-ground. This isn't a minor distinction.
When coffee is ground, the total surface area exposed to air, humidity, and potential contamination increases dramatically. Ground coffee also loses its protective outer structure, which provides some physical barrier against mold spore penetration. The shelf life of pre-ground coffee is shorter, and the window during which mold can establish itself is correspondingly wider.
The practical recommendation: grind only what you'll brew immediately. A burr grinder is a one-time investment that pays for itself in freshness and reduced contamination risk over time.
Best Coffee Storage Containers to Keep Mold Away
The best coffee storage containers for mold prevention share three characteristics: an airtight seal, an opaque or UV-resistant body, and a material that doesn't absorb odors or moisture.
Here's how the main options compare:
| Container Type | Airtight Seal | Moisture Resistance | Best For |
|---|---|---|---|
| Vacuum-seal canister | Excellent | Excellent | Long-term whole bean storage |
| Ceramic with rubber seal | Very good | Very good | Counter storage, 1-2 weeks |
| Stainless steel with lid | Good | Good | Daily use, durability |
| Glass with clamp seal | Good | Good | Visibility, short-term |
| Original paper bag | Poor | Poor | Transport only, not storage |
Avoid plastic containers for anything beyond a day or two. Plastic is porous, absorbs odors, and can harbor moisture in microscopic surface irregularities. The investment in a quality airtight container is small compared to the cost of repeatedly discarding moldy coffee.
How to Clean Coffee Maker Mold: Equipment Maintenance Protocols
Equipment hygiene is the angle that almost every guide on how to prevent coffee mold completely ignores, and it's where many home brewers unknowingly introduce contamination into an otherwise clean routine. Coffee makers create warm, moist environments that are nearly ideal for mold and yeast growth. Residual coffee oils coat interior surfaces, providing a food source for fungi. The result is that your machine can be actively introducing mold into every cup, regardless of how carefully you've stored your beans.
What makes this worse is that mold in brewing equipment is not always visible. Biofilm, a thin, structured layer of microbial growth, can colonize plastic and rubber surfaces while appearing as nothing more than a slight discoloration or a faint musty smell. By the time visible mold appears, contamination has typically been present for days or weeks.
The protocols below are organized by machine type because the vulnerable components differ significantly between a drip brewer, an espresso machine, and a pod-based system. Generic advice to "run a vinegar cycle" misses the parts that actually harbor mold.
Drip Coffee Makers: The Four Zones That Harbor Mold
Drip machines have four components that consistently develop mold when under-cleaned:
1. The water reservoir This is the highest-risk component in any drip machine. Reservoirs are often opaque, rarely inspected, and designed in ways that make complete drying nearly impossible. Stagnant water at room temperature is a mold incubator.
- Empty the reservoir completely after every brew session. Do not leave water sitting between uses.
- Once per week, wash the reservoir with warm water and a small amount of unscented dish soap, then rinse thoroughly. Many reservoirs are not dishwasher-safe, check the manufacturer's guidance.
- Once per month, fill the reservoir with a solution of equal parts white distilled vinegar and water, run half the brew cycle, pause for 30 minutes to allow the solution to contact all internal surfaces, then complete the cycle. Follow with two full cycles of clean water to flush residual vinegar.
- Inspect the reservoir walls for any pink, orange, or dark discoloration. Pink or orange biofilm is typically Serratia marcescens, a bacteria that thrives in moist environments and signals that the reservoir has not been drying between uses.
2. The brew basket and filter holder Spent grounds left in the basket for more than a few hours begin to develop mold, particularly in warm kitchens. The basket itself retains moisture in its seams and any surface texture.
- Remove and rinse the brew basket immediately after each use.
- Wash with warm soapy water daily if the machine is used every day.
- Inspect the underside of the basket lid and any rubber gaskets around the basket seat, these collect coffee residue and are frequently missed.
3. The carafe and carafe lid The carafe lid is the most overlooked component in drip machine hygiene. The lid's interior often has a small rubber seal or channel that traps brewed coffee and dries into a film that mold colonizes readily.
- Disassemble the lid fully if it has removable parts and wash each component separately.
- Do not let brewed coffee sit in the carafe for more than two hours at room temperature.
- Thermal carafes are particularly prone to biofilm buildup on the interior walls because they are harder to inspect and dry. Use a bottle brush weekly.
4. The hot plate and exterior drip area Spilled coffee on the hot plate carbonizes and creates a surface that retains moisture when the machine cools. Wipe the hot plate after every use once it has cooled.
Espresso Machines: Gaskets, Group Heads, and Dreg Drawers
Espresso machines have more components in contact with coffee than drip machines, and several of them are under pressure during brewing, which forces coffee oils and fine particles into seams and gaskets where mold establishes itself.
Group head gasket The rubber gasket that seals the portafilter to the group head is one of the most mold-prone components in any espresso machine. Coffee oils and fine grounds accumulate in the gasket groove with every shot. Over time, the gasket develops a dark, oily residue that is partly oxidized coffee oil and partly microbial biofilm.
- After each use, run a blank shot (water only, no portafilter) to flush the group head.
- Weekly, use a group head brush to scrub the gasket groove and shower screen while running water through the group head.
- Monthly, perform a backflush using an espresso machine cleaning tablet (such as those containing sodium percarbonate, which is the active ingredient in most commercial espresso cleaner products). Follow the manufacturer's backflush procedure exactly, typically involving a blind basket and several short cycles.
- Inspect the gasket every three to six months. A gasket that has developed permanent dark staining that does not clean off, or that has become tacky or cracked, should be replaced. Gaskets are inexpensive and are a common source of off-flavors and contamination in machines that are otherwise well-maintained.
Dreg drawer (knock box drawer) The dreg drawer accumulates spent pucks of compressed grounds. Even a single puck left overnight in a warm kitchen will begin to develop surface mold within 24 to 48 hours.
- Empty the dreg drawer after every use, not when it is full.
- Rinse with hot water daily.
- Wash with soap weekly and allow to dry completely before reinserting, a damp drawer reinserted into the machine creates a humid microenvironment that accelerates mold growth on surrounding components.
Steam wand Milk residue on and inside the steam wand is one of the fastest-developing mold sites in any espresso setup. Milk proteins and sugars are a rich growth medium.
- Purge the steam wand immediately after every use by briefly opening the steam valve to clear residual milk from the tip.
- Wipe the exterior of the wand with a damp cloth immediately after purging, while it is still warm.
- Weekly, soak the steam wand tip in a small cup of hot water for 10 to 15 minutes to dissolve any dried milk deposits, then wipe clean.
- If the wand tip has small holes that appear blocked, use a pin or the cleaning tool supplied with the machine to clear them, blocked holes cause milk to back up into the wand interior.
Pod and Capsule Machines: The Needle and the Drip Tray
Pod machines are marketed for convenience, but their design creates specific mold risks that users rarely address.
The puncture needle Pod machines use a needle or blade to puncture the capsule. Coffee grounds and liquid accumulate on and around the needle with every use. Because the needle is inside the brew chamber and not easily visible, contamination builds unnoticed.
- Most pod machine manufacturers include a needle-cleaning tool with the machine or sell one separately. Use it monthly, following the manufacturer's instructions.
- If no tool is available, a straightened paper clip can be used carefully to clear grounds from around the needle, power the machine off and unplug it before doing this.
- Run two to three water-only cycles after cleaning the needle to flush any dislodged debris.
The drip tray The drip tray on pod machines collects liquid that sits at room temperature between uses. Even small amounts of residual coffee create a growth medium for fungi within 24 to 48 hours in warm conditions.
- Empty and rinse the drip tray daily if the machine is used daily.
- Remove the drip tray grate (the removable top section) and wash it separately, the underside of the grate and the tray floor are where biofilm accumulates first.
- Allow the tray to dry before reinserting.
Grinders: The Most Overlooked Mold Vector
Grinders are almost never mentioned in coffee mold guides, but they represent a genuine cross-contamination risk. Ground coffee accumulates in the burr chamber, the chute, and the grounds bin. In humid environments or if the grinder is stored near a heat source, this residual coffee can develop mold that then contaminates every subsequent grind.
- Empty the grounds bin after each use and allow it to air dry.
- Weekly, use the grinder's cleaning brush (or a dry pastry brush) to sweep the burr chamber and chute. Do not use water on burrs unless the manufacturer explicitly states they are washable, water causes rust on steel burrs.
- Monthly, run a small amount of grinder-cleaning tablets (products like Grindz are widely available and food-safe) through the grinder, followed by a small amount of sacrificial coffee beans to purge any tablet residue.
- Inspect the grounds bin and chute for any white or greenish discoloration. If found, wash the bin with warm soapy water, dry completely, and consider whether the grinder's storage environment is too humid.
Quick-Reference Cleaning Schedule
| Frequency | Component | Action |
|---|---|---|
| After every use | Dreg drawer, drip tray, carafe, steam wand | Empty, rinse, wipe |
| Daily | Brew basket, reservoir (empty and leave open to dry) | Rinse with hot water |
| Weekly | All removable parts, reservoir interior, grinder burr chamber | Wash with soap, brush, dry fully |
| Monthly | Full machine descale/clean cycle, backflush (espresso), needle cleaning (pod), grinder tablets | Per manufacturer protocol |
| Every 3-6 months | Gaskets, seals, tubing, reservoir walls | Inspect and replace if discolored, cracked, or tacky |
How to Prevent Coffee Mold at the Source: Sourcing and Quality Control
The most effective way to prevent coffee mold is to start with beans that were processed and transported under rigorous quality control. Home storage and equipment hygiene matter, but they cannot remediate beans that were already contaminated before they reached you. Mycotoxins that form during drying or shipping are present in the bean matrix itself, no amount of careful home storage reverses that.
This is where sourcing decisions have real consequences. Cuppari Coffee addresses this directly through its roast-to-order model: beans are roasted only after an order is placed and shipped the same day, which means there is no extended warehousing period where beans sit in potentially suboptimal storage conditions. Freshness isn't just about flavor in this context, it's a meaningful mold prevention measure.
What Happens at the Farm and Mill Level
Mold risk in coffee is largely determined before the beans are ever roasted. The two processing stages with the highest contamination risk are drying and fermentation.
Drying is the single most critical control point. Beans that are dried on raised, ventilated beds with adequate airflow and turned regularly are significantly less likely to develop mold than beans dried on bare ground or concrete patios where airflow is poor and contact with soil introduces additional fungal spores. Ground drying is still common in some producing regions because it requires less infrastructure, and it is a meaningful quality differentiator when evaluating origins.
Wet processing fermentation introduces risk when fermentation tanks are not cleaned between batches or when fermentation runs too long. Over-fermented beans develop off-flavors and are more susceptible to fungal contamination because the fruit pulp has broken down further, creating a more hospitable environment for mold.
When evaluating any coffee source, the supply chain practices to look for include:
- Transparent sourcing with named farms or cooperatives, not just country of origin
- Wet processing with documented fermentation time controls (typically 12-36 hours depending on ambient temperature)
- Raised drying beds (also called African beds or raised drying tables) rather than ground or patio drying
- USDA Organic certification, which requires documented pest and contamination controls across the supply chain
- Fair trade or direct trade relationships, which typically involve more consistent quality auditing and longer-term supplier relationships that incentivize quality maintenance
Shade-grown coffee, often associated with higher quality and environmental standards, is generally processed with more care, though shade-grown designation alone is not a mold-prevention guarantee.
Scientific Testing and Verification: How to Actually Confirm a Brand's Claims
This is the section that most coffee guides, including those from brands that market themselves as "mold-free", either skip entirely or handle with vague reassurances. Here is what the verification process actually looks like.
What is a Certificate of Analysis (COA)?
A Certificate of Analysis is a document issued by an accredited third-party laboratory confirming that a specific lot of product was tested and the results for specified contaminants fell within acceptable limits. In the context of coffee and mycotoxins, a COA should show:
- The name and accreditation of the testing laboratory (look for ISO/IEC 17025 accreditation, which is the international standard for testing laboratory competence)
- The specific lot or batch number tested
- The date of testing
- The specific mycotoxins tested, at minimum, ochratoxin A and aflatoxin B1
- The method used for detection (common methods include HPLC with fluorescence detection, ELISA, or LC-MS/MS, the latter is generally considered the most sensitive and specific)
- The detected levels in quantified units (typically micrograms per kilogram, written as µg/kg or ppb)
- The method's limit of detection (LOD) and limit of quantification (LOQ), which tell you how sensitive the test actually was
- A pass/fail determination against a specified regulatory standard
How to request and evaluate a COA
Any brand that genuinely tests for mycotoxins should be able to provide a COA on request. The practical steps:
- Email or contact the brand's customer service and ask specifically: "Do you test for ochratoxin A and aflatoxin? Can you provide a Certificate of Analysis for the lot I'm purchasing?"
- When you receive the document, check that it comes from a named third-party laboratory, not an internal quality document. Internal testing documents are not equivalent to third-party COAs.
- Verify that the lab is ISO/IEC 17025 accredited. Most accredited labs list their accreditation number on the COA and you can cross-reference it with the accrediting body's public registry.
- Check that the lot number on the COA corresponds to the product you're buying. A COA from a single batch tested a year ago does not validate current inventory.
- Look at the detected levels against the EU regulatory limits as a reference benchmark: the EU sets a maximum of 10 µg/kg for ochratoxin A in roasted coffee, which is among the stricter standards globally. A COA showing levels well below this threshold from a recent lot is meaningful. A COA that only states "pass" without showing the detected level is less informative.
Red flags in brand testing claims
- Claims of "mold-free" or "mycotoxin-free" without any reference to specific testing methodology or third-party documentation
- Testing claims that apply to an entire product line without lot-level specificity
- References to "proprietary testing" without naming the laboratory or method
- COAs that test for "mold" generally (colony counts) without specifically identifying ochratoxin A and aflatoxin, general mold testing does not measure mycotoxin levels
- Certifications cited as proof of mycotoxin testing when those certifications (such as organic or fair trade) do not actually require mycotoxin-specific laboratory analysis
What certifications actually tell you
USDA Organic, Rainforest Alliance, and similar certifications include supply chain audits that reduce contamination risk by requiring documented practices at the farm and processing level. They are meaningful signals of quality control culture. However, none of these certifications require lot-level mycotoxin testing as a condition of certification. They reduce risk; they do not independently verify mycotoxin levels in the final product.
As noted in peer-reviewed research on ochratoxin A in roasted coffee, ochratoxin A levels in roasted coffee vary significantly by origin, processing method, and roast degree, which means blanket claims of "mold-free" without specific testing data should be treated skeptically regardless of the price point or certification on the bag.
The practical bottom line
Most consumers will not go through the full COA verification process for every bag of coffee they buy, and that is reasonable. But knowing what a genuine testing claim looks like makes it easier to distinguish brands that have invested in real quality control from those using "mold-free" as a marketing phrase. A brand confident in its quality control will have documentation. One that deflects with marketing language when asked for specifics probably will not.
Frequently Asked Questions
Can coffee beans actually grow mold?
Yes, coffee beans can grow mold, especially when exposed to excess moisture, high humidity, or poor storage conditions. Mold spores are naturally present in the environment and can colonize beans during harvesting, processing, or improper home storage. Whole bean coffee is somewhat more resistant than pre-ground because less surface area is exposed, but no coffee is completely immune without proper moisture management and airtight storage conditions.
How do you know if coffee beans have mold?
Common signs of moldy coffee beans include visible white, green, or black fuzzy patches on the bean surface, an unusually musty or earthy smell that differs from normal coffee aroma, and a damp or clumped texture in pre-ground coffee. Discoloration beyond typical roast variation is another warning sign. If your coffee smells off or looks unusual, it is safer to discard it rather than brew it, as mycotoxins like ochratoxin A can remain even after roasting.
Does moldy coffee make you sick?
Drinking coffee made from heavily moldy beans can potentially cause nausea, headaches, or digestive discomfort in sensitive individuals. The greater concern is long-term low-level exposure to mycotoxins such as aflatoxin and ochratoxin A, which are produced by fungi and may persist through the roasting process. Occasional trace exposure is unlikely to cause acute illness for most healthy adults, but consistently consuming mold-contaminated coffee is not advisable. Sourcing clean coffee and storing it correctly significantly reduces this risk.
How should you store coffee to prevent mold?
To prevent coffee mold, store beans in an airtight container away from heat, light, and humidity. Keep them at room temperature in a cool, dry cabinet, not in the refrigerator, where condensation introduces moisture. Use your coffee within two to four weeks of the roast date for best freshness and mold prevention. Whole bean coffee stored in a quality airtight container with a one-way valve offers the best protection against oxidation and moisture, both of which accelerate mold growth and reduce shelf life.
How often should you clean your coffee maker to prevent mold?
You should rinse removable parts like the drip tray, dreg drawer, and carafe daily, and perform a deeper clean of the full machine at least once a week. Run a descaling or cleaning cycle with a food-safe cleaner or diluted white vinegar monthly. Pay special attention to the water reservoir, which stays damp and is a prime zone for mold and bacteria. Leaving standing water in any part of your brewing equipment between uses is one of the most common causes of coffee maker mold.
Is USDA Organic or fair trade coffee less likely to contain mold?
USDA Organic certification restricts the use of certain synthetic pesticides and fungicides, which can influence how mold is managed during growing. However, organic certification alone does not guarantee mold-free coffee. What matters more is the quality control throughout the supply chain, including harvesting practices, drying methods, and storage conditions. Shade-grown and carefully processed coffees often have better moisture management during drying, which can reduce mold risk. Always look for roasters who roast to order and ship fresh for the lowest mold exposure risk.
This article was written using GrandRanker