

Table of Contents
- What You'll Need to Recycle Plastic Coffee Pods at Home
- Step-by-Step: How to Recycle Plastic Coffee Pods at Home
- Keurig K-Cup Recycling: Manufacturer Program Options
- Nespresso Pod Recycling: Official Collection Programs
- Coffee Pod Recycling Tools: What Actually Works
- Compostable Coffee Pods: A Sustainable Alternative
- Finding Local Recycling Drop-Off Points and Programs
- Common Mistakes to Avoid When Recycling Coffee Pods
How to Recycle Plastic Coffee Pods at Home: A Step-by-Step Guide
Last Updated: July 21, 2026
Most single-serve coffee pods aren't accepted in standard curbside programs, but they're far from destined for the landfill. Multiple pathways exist to recycle these pods responsibly, from manufacturer take-back programs to home separation techniques. This guide walks you through exactly how to recycle plastic coffee pods at home, covering separation methods and finding certified programs in your area.
What You'll Need to Recycle Plastic Coffee Pods at Home
Most single-serve pods contain three distinct materials: a plastic shell (typically #5 polypropylene), an aluminum foil lid, and a paper or mesh filter filled with used coffee grounds. Separating these components is essential because they process through different recycling streams.
Essential Tools and Materials
You don't need expensive equipment. A simple spoon or butter knife pries open the foil lid, a small bowl holds separated components, and paper towels catch used grounds. Keep a designated container near your coffee maker for collecting used pods before processing them, creating an efficient workflow.
Understanding Pod Materials
The plastic shell of most K-Cup and Nespresso pods is polypropylene (#5 plastic), recyclable through many municipal programs when separated from other materials. The aluminum foil lid is highly valuable and processes separately. The filter paper and coffee grounds are compostable.
Check the pod's bottom for a resin code number to confirm the plastic type before processing.
Step-by-Step: How to Recycle Plastic Coffee Pods at Home
The actual process takes about 30 seconds per pod once you establish a rhythm.
Step 1: Empty and Rinse Your Pods
Start immediately after brewing while the pod is still warm. Tap the pod gently over your compost bin to dislodge loose grounds. Rinse the inside under running water to remove remaining grounds and residue. This prevents contamination in the recycling stream, which is critical, wet or heavily soiled plastic reduces its recyclability. Pat the pod dry with a paper towel before moving to the next step.
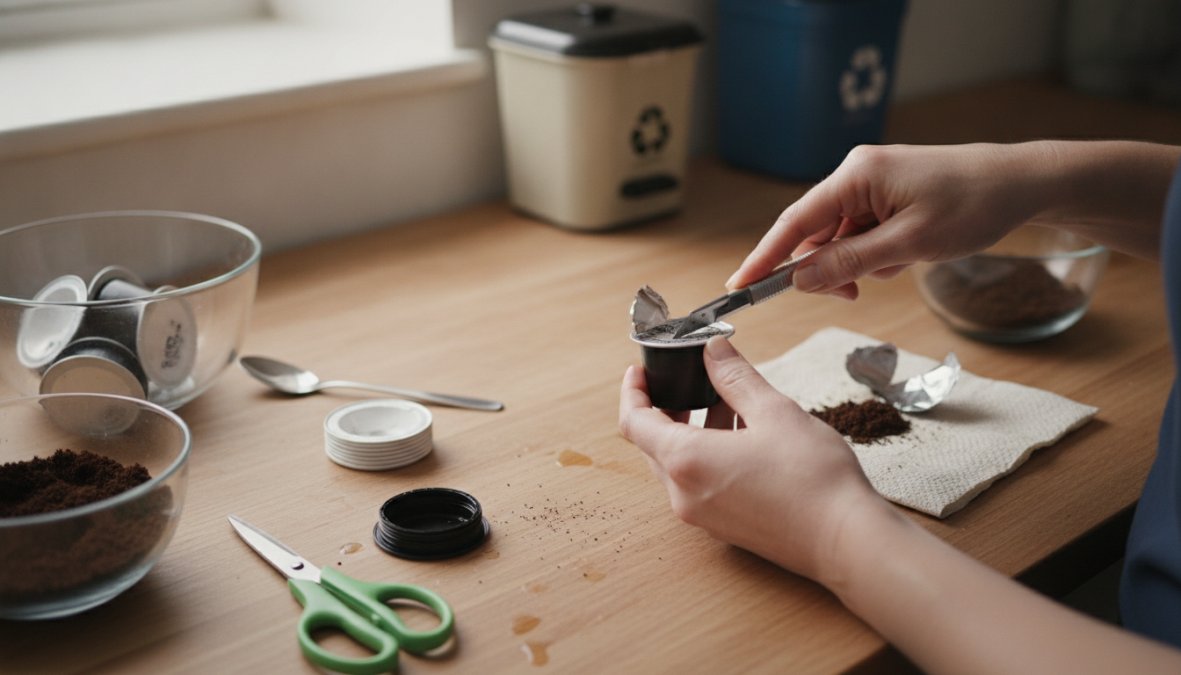
Step 2: Separate Pod Components
Using a spoon or small knife, gently pry up the aluminum foil lid by working around the edge. Once loose, peel it away completely and set it aside in a separate container.
Next, examine the plastic shell. Many pods have a small perforated circle at the bottom designed to be pushed out, which exposes the filter paper and grounds inside. If your pod doesn't have this feature, use your spoon to scoop out the filter paper and remaining grounds.
Separate the filter paper from the plastic shell. Paper filters are compostable; mesh filters should go to trash since they don't break down in standard compost systems.
Step 3: Sort by Material Type
Create a simple sorting system with three containers: one for plastic shells, one for aluminum lids, and one for grounds and filters. Plastic shells go directly into your curbside recycling bin if your municipality accepts #5 plastic. Aluminum lids should also go to curbside recycling. Grounds and filters go to your compost bin or yard waste collection.
Keurig K-Cup Recycling: Manufacturer Program Options
Keurig operates the K-Cup Recycling Program, the most straightforward option if you want centralized processing. Visit the Keurig website, request a prepaid shipping label, collect your used K-Cups, and drop the package at a UPS location. Keurig then processes the pods at certified facilities, separating each component.
Alternatively, some retailers that sell K-Cups accept used pods for recycling. Check with your local grocery stores, Target, or specialty coffee shops, many have collection bins near checkout or the coffee aisle.
Nespresso Pod Recycling: Official Collection Programs
Nespresso operates a comprehensive take-back program with drop-off locations in many communities. Nespresso boutiques, selected Best Buy locations, and some grocery stores accept used capsules for free recycling. Visit the Nespresso website and enter your zip code to find nearby collection points.
For customers without nearby drop-off points, Nespresso provides prepaid shipping bags that hold approximately 200 capsules. The aluminum from Nespresso capsules is especially valuable because it's high-quality and highly recyclable.
Coffee Pod Recycling Tools: What Actually Works
Several companies have developed specialized tools for separating coffee pods. The most popular handheld devices cost between $15 and $30 and use a clamping or twisting motion to open the top.
However, manual tools aren't necessary for basic home recycling. They're most valuable if you process 10+ pods daily. For typical household use (3-5 pods per day), a spoon accomplishes the same result in about the same time.
| Tool | Cost | Best For |
|---|---|---|
| Kitchen spoon | $0 | All households |
| Manual pod opener | $20-30 | Heavy users (10+ pods/day) |
| Compostable bags | $10-20 (per 50) | Convenience-focused users |
Compostable Coffee Pods: A Sustainable Alternative
Compostable pods eliminate the recycling effort entirely by breaking down into soil amendments. Look for pods certified by the Biodegradable Products Institute (BPI) or similar third-party certifiers. These certifications guarantee the pod will break down within a reasonable timeframe in appropriate conditions.
Before buying compostable pods in bulk, verify that your local composting facility accepts them. Many commercial composting sites reject them because they can't guarantee the specific temperature and timeframe needed for breakdown.
Coffee grounds themselves are nitrogen-rich and decompose quickly, making them excellent compost ingredients. Layer grounds in your compost bin with carbon-rich materials like leaves or cardboard. Most home compost systems produce finished compost within 2-6 months when properly maintained.
Finding Local Recycling Drop-Off Points and Programs
Most curbside recycling programs do NOT accept unseparated coffee pods. However, separated components often qualify. Check your local program's website or call the waste management department to confirm what they accept, as regional variations are significant.
The most efficient way to find recycling options is using Earth911's recycling search database at Earth911.com. Enter your zip code and material type, and the tool shows nearby drop-off locations. For manufacturer-specific programs, visit Keurig.com or Nespresso.com and use their location finders.
Call ahead before visiting drop-off locations to confirm hours and current acceptance policies.
Common Mistakes to Avoid When Recycling Coffee Pods
The most frequent mistake is putting unseparated pods in curbside recycling. Mixed materials jam sorting equipment, and contaminated batches are often rejected entirely. Always separate components before recycling.
Another common error is rinsing pods too thoroughly or leaving them wet when placing them in recycling bins. Wet materials contaminate other recyclables and create processing problems. Rinse just enough to remove grounds, then let pods air-dry.
Some people assume all plastic pods are recyclable. Many programs only accept #1 and #2 plastics, while most pods are #5. Check your program's specific accepted plastics before placing materials in the bin.
Process pods within a day or two of brewing, dried grounds stick stubbornly to filters. Soak them briefly in water if processing later.
Once you understand the separation process and know your local options, recycling becomes automatic. By choosing quality coffee and recycling responsibly, you're making a genuine environmental impact while enjoying better-tasting coffee. Start with the separation method that fits your routine, whether that's a simple spoon approach or a manufacturer take-back program, and make it part of your daily habit.
Frequently Asked Questions
What's the best way to separate coffee pod components before recycling?
Start by emptying the pod completely and rinsing away residue under running water. Gently peel back the foil lid with your fingernail or a flathead screwdriver. Pour out the used coffee grounds and filter paper. Rinse the plastic shell thoroughly to remove any remaining grounds or moisture. Separate the aluminum foil lid, plastic shell (typically #5 polypropylene), and filter paper into distinct piles. Let all components air dry completely before placing them in your recycling bin or drop-off container. This pre-sorting prevents contamination and improves processing efficiency at municipal recycling facilities.
Can I put plastic coffee pods in my curbside recycling bin?
Curbside recycling requirements vary significantly by municipality. Many areas reject small plastic pods because they jam sorting equipment or fall through screening processes at waste facilities. Before placing pods in your bin, check your local recycling program's guidelines, most provide this information on their website or through a regional recycling lookup tool. Some communities accept separated components (like #5 plastic shells) if they're large enough, while others recommend drop-off at specialized facilities. Always verify your specific area's rules to avoid contaminating the recycling stream.
Are compostable coffee pods truly better for the environment?
Compostable coffee pods break down in industrial composting facilities, but they require specific conditions (heat, moisture, microbes) not found in home compost or landfills. Check for certifications like ASTM D6868 or EN 13432 to verify genuine compostability. Even certified compostable pods won't decompose in standard curbside green waste programs at many facilities. If your area lacks industrial composting, these pods may end up in landfills anyway. The environmental benefit depends on your access to proper composting infrastructure. Coffee grounds themselves are excellent for home composting regardless of pod type, making them a more reliable sustainable choice than relying on pod compostability.
Do Keurig K-Cup and Nespresso offer official recycling programs?
Yes, both manufacturers operate dedicated recycling programs. Keurig's K-Cup recycling program accepts used K-Cups at participating drop-off locations and through mail-back options in some regions. Nespresso maintains collection points at boutique stores and partner retailers, plus a mail-back program for members. Both programs typically cover shipping costs. However, availability varies by location and subscription status. Visit each manufacturer's website to find drop-off points near you or enroll in their mail-back service. These official programs ensure pods are processed responsibly and materials are recovered for reuse in manufacturing.
This article was written using GrandRanker