

Last Updated: October 26, 2026
Quick Summary
Flat latte art foam results from improper steaming technique, incorrect temperature, or equipment issues. The most common causes are aerating too long, steaming above 160°F, skipping the integration stage, or using weak espresso that cannot support the foam structure.
- Stop aeration after 3-5 seconds, then integrate foam by pushing the steam wand deeper into the milk.
- Steam milk to exactly 150-155°F using a thermometer to prevent protein breakdown above 160°F.
- Use milk that is 3-7 days old, as ultra-fresh or very old milk foams poorly.
- Pull a proper double shot taking 25-30 seconds with good pressure to support latte art.
- Clean your steam wand after every use to maintain proper steam pressure and microfoam quality.
Table of Contents
- Why Your Latte Art Foam Stays Flat
- How to Steam Milk for Latte Art Without Collapsing Foam
- Getting Milk Steaming Temperature for Latte Art Right
- Fixing Thick Foam in Latte Art That Won't Integrate
- Why Latte Art Not Spreading When You Pour
- Common Mistakes That Create Flat Foam
- Improving Your Setup: Tools That Stabilize Microfoam
- Frequently Asked Questions
Why Your Latte Art Foam Stays Flat
Flat latte art foam frustrates even experienced baristas. The problem isn't always about skill, it's usually about technique, temperature, or equipment. When your flat latte art foam won't hold shape, one of five core issues is at play.
The real challenge is that foam collapse happens for different reasons. Your milk might be too hot. Your steaming angle might be wrong. Your pitcher could be the issue. Or your espresso machine simply isn't designed for consistent microfoam. Understanding which factor is breaking down your foam is the first step to fixing it.
This guide walks you through the five most common causes of how to troubleshoot flat latte art foam and gives you the exact fixes to try. By the end, you'll know exactly what's going wrong and how to correct it.
How to Steam Milk for Latte Art Without Collapsing Foam
Steaming milk correctly is the foundation of latte art. Most people steam too aggressively or hold the pitcher at the wrong angle. Both mistakes create large, unstable bubbles instead of tight microfoam.
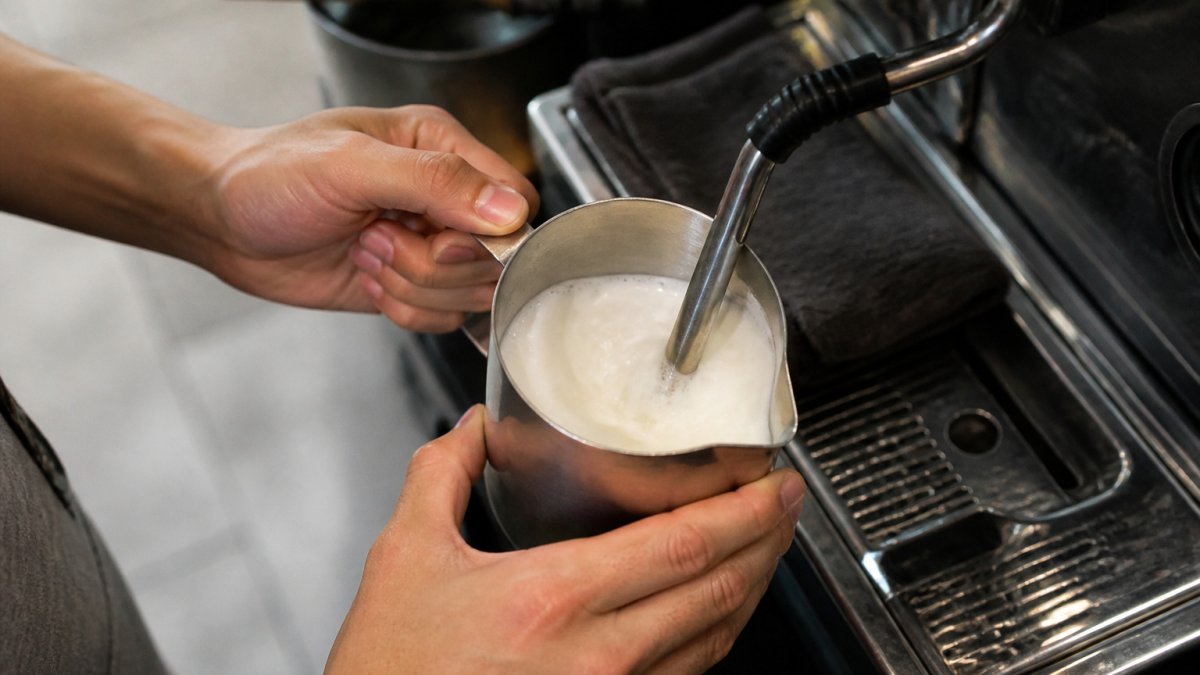
The Two-Stage Steaming Process
The two-stage method separates foam creation from foam integration. This is how baristas build latte art not spreading into something that actually holds.
Stage 1: Aeration (first 3-5 seconds)
Start with the steam wand tip just below the milk surface. You'll hear a sharp hissing sound. This is where air enters the milk. Keep the wand positioned this way for only 3-5 seconds. Too long here and you'll overfill with large bubbles that won't integrate.
Stage 2: Integration (remaining time)
Push the wand deeper into the milk. The hissing stops. Now you're creating a whirlpool that spins the foam and milk together. This is where microfoam becomes dense and glossy. Continue until the pitcher is too hot to hold comfortably (around 150-155°F).
The mistake most people make is spending too much time in stage 1. They keep aerating when they should be integrating. Result: loose, bubbly foam that collapses immediately.
Angle and Depth Matter
The angle of your pitcher changes everything. Hold it at about 20 degrees, not upright, not sideways. This angle keeps the steam wand positioned perfectly at the milk surface during aeration, then allows for a smooth transition to deeper steaming.
Depth is equally critical. If your wand is too deep from the start, you skip aeration entirely. If it's too shallow throughout, you create only bubbles. The sweet spot is just barely submerged during stage 1, then deeper during stage 2.
Watch your milk's surface. You should see a small whirlpool form. If the milk is churning violently, your wand is too deep. If there's no movement at all, it's too shallow.
Getting Milk Steaming Temperature for Latte Art Right
Temperature is where most flat foam problems hide. Too hot and the milk breaks down. Too cool and the foam won't set properly.
The ideal milk steaming temperature for latte art is 150-155°F. This range keeps the milk proteins stable while creating microfoam that holds its structure. Above 160°F, proteins denature and foam collapses. Below 140°F, the foam never stabilizes.
Using a thermometer removes the guesswork. The Barista Basics 7" Large Steaming Thermometer clips onto frothing pitchers and has a target range indicator on its dial.
A common mistake is steaming past 155°F because you're still integrating foam. Stop steaming the moment you hit 155°F. The milk will continue heating slightly from residual steam. You'll land in the perfect zone.
If you're hand-steaming without a thermometer, pull your hand away when the pitcher becomes uncomfortable to hold. That's roughly 150°F. It's not precise, but it's better than guessing.
Fixing Thick Foam in Latte Art That Won't Integrate
Sometimes the problem is the opposite. Your foam is too thick, almost like whipped cream. It won't blend with the espresso and won't pour smoothly for latte art.
Thick foam in latte art usually means you spent too long in the aeration stage. You created too many bubbles and not enough integration time. The fix is simple: reduce aeration time to 2-3 seconds instead of 5, then spend the rest of the steaming cycle integrating.
Another cause is low steam pressure. If your machine's steam wand produces weak steam, you can't create the turbulence needed for integration. The bubbles stay large and separate from the milk. Check your machine's steam pressure gauge if it has one. Most espresso machines should produce 1.5+ bars of steam pressure.
If thick foam persists even with proper technique, your milk might be too fresh. Ultra-fresh milk (less than 24 hours old) has different protein structures and foams differently. Try milk that's 3-5 days old. You'll see a difference immediately.
Why Latte Art Not Spreading When You Pour
Your foam looks perfect in the pitcher. But the moment you pour, it breaks apart or spreads too thin. This is usually a temperature or integration problem.
Latte art not spreading happens when the foam isn't fully integrated with the milk. You have a layer of foam on top instead of microfoam throughout. The espresso breaks through the foam layer instead of supporting a pattern.
The fix: extend your integration stage. After aeration, keep the wand deep in the milk for at least 10-15 seconds. You want the milk to feel completely smooth and glossy. If you can feel texture or graininess, keep steaming.
Temperature also plays a role. If your milk is below 150°F when you pour, the foam won't hold shape. If it's above 160°F, the proteins have broken down. Aim for exactly 155°F every time.
Finally, check your espresso. If the shot is too thin or too fast, it won't support latte art. Aim for a 1.5-2 ounce double shot that takes 25-30 seconds to pull. Weak espresso collapses foam instantly.
Common Mistakes That Create Flat Foam
Knowing what not to do saves hours of frustration.
Mistake 1: Aerating for too long More bubbles doesn't mean better foam. Stop aeration after 3-5 seconds, then integrate.
Mistake 2: Steaming too hot Above 160°F, milk proteins break down. Your foam collapses. Use a thermometer.
Mistake 3: Using old or ultra-fresh milk Milk that's been sitting more than 2 weeks or less than 24 hours foams poorly. Aim for 3-7 days old.
Mistake 4: Skipping the whirlpool If your milk isn't spinning, you're not integrating. Move the wand deeper and watch for movement.
Mistake 5: Pulling weak espresso Thin shots can't hold foam. Pull a proper double shot with good pressure and timing.
Mistake 6: Using a clogged steam wand Milk buildup blocks steam pressure. Clean your wand after every use.
These six mistakes are the most common causes of flat foam in latte art.
| Mistake | What Happens | Fix |
|---|---|---|
| Aerating for too long | Creates large bubbles instead of microfoam | Stop aeration after 3-5 seconds, then integrate |
| Steaming too hot | Milk proteins break down and foam collapses | Use a thermometer and stop at 155°F |
| Using old or ultra-fresh milk | Milk foams poorly | Use milk that is 3-7 days old |
| Skipping the whirlpool | Foam doesn't integrate with milk | Move wand deeper and watch for spinning |
| Pulling weak espresso | Thin shots cannot hold foam | Pull a proper double shot with good pressure |
| Using a clogged steam wand | Milk buildup blocks steam pressure | Clean wand after every use |
Improving Your Setup: Tools That Stabilize Microfoam
Your technique can only go so far if your equipment is fighting you.
The Barista Basics 7" Large Steaming Thermometer has a target range indicator. It is priced at $16.00.
Consider the OutIn LattoGo for $49.99. Its whisk has a dense mesh screen with reinforced ribs, and its air intake is adjustable by changing the frother's angle. Its raised tip enables bottom-reaching use.
For espresso machines, check your steam pressure. Most home machines produce 1.5-2 bars. If yours is lower, you're fighting an uphill battle. A pressure gauge costs $20-40 and tells you exactly what you're working with.
Finally, invest in fresh milk. Cuppari Coffee's beans are roasted after an order is placed and shipped the same day.
Frequently Asked Questions
Why does my flat latte art foam collapse immediately after pouring?
Flat latte art foam collapses when the microfoam lacks stability, usually due to over-aeration or incorrect steaming technique. If you introduce air for too long or at the wrong angle, you create large bubbles instead of tiny, tightly-packed ones. These large bubbles break apart during the pour. Additionally, if your milk temperature drops below 150°F before pouring, the proteins relax and lose their structure, causing collapse.
What's the ideal milk steaming temperature for latte art?
Aim for 150-155°F for optimal microfoam. At this range, milk proteins are stretched but not overcooked, and the foam remains stable during pouring. The Barista Basics 7" Large Steaming Thermometer ($16.00) has a target range indicator. Stop steaming the moment you hit 155°F; going hotter denatures proteins and creates flat, thin foam that won't hold latte art patterns.
How do I know if my foam is under-aerated or over-aerated?
Under-aerated foam is thick, chunky, and sits on top of the milk like a cap. Over-aerated foam is thin, bubbly, and looks more like soapy liquid. Proper microfoam for latte art should look glossy, smooth, and pourable, it should integrate seamlessly with the steamed milk without separating. If you see large visible bubbles, you've over-aerated. If it's stiff and won't pour smoothly, you haven't aerated enough.
Can I fix flat latte art foam after steaming, or do I need to re-steam?
Once foam flattens, re-steaming is your best option because the protein structure has already broken down. However, you can extend foam life by pouring immediately after steaming and avoiding delay. If you must wait, tap the pitcher gently on the counter to reintegrate large bubbles into the milk, then pour right away. The OutIn LattoGo ($49.99) has a whisk with a dense mesh screen and reinforced ribs.
