

Table of Contents
- What You'll Need to Brew Espresso at Home
- Choosing an Espresso Machine or Brewing Method
- Selecting and Preparing Your Coffee Beans
- Getting Your Espresso Grind Size Right
- Measuring Your Dose and Mastering the Brew Ratio
- Tamping, Pulling Your Shot, and Dialing In
- How to Make Espresso Without a Machine
- Water Quality, Machine Maintenance, and Common Mistakes
- Frequently Asked Questions
Last Updated: October 6, 2026
What You'll Need to Brew Espresso at Home
To brew espresso at home, you need the right tools for consistent, flavorful shots: a machine or brewing device, a grinder, a scale, and tamping and measuring accessories.
The mistake most beginners make is buying cheap equipment and hoping it works, espresso demands precision.
Here's what every setup needs:
- An espresso machine or manual brewer to apply pressure and extract the coffee
- A burr grinder to create uniform, fine grounds (crucial for consistency)
- A scale to measure your dose accurately
- A tamper to compress the coffee bed evenly
- A portafilter and filter basket (usually included with machines)
- Heat-resistant cups to catch your shots without burning yourself
You don't need to spend thousands: a solid entry-level setup starts around $200-300 and produces excellent espresso for years.
Choosing an Espresso Machine or Brewing Method
Manual lever machines, semi-automatic pumps, and fully automatic systems each have different learning curves and price points. Your choice depends on how much control you want and how much time you'll invest.
Manual lever machines require you to apply pressure by hand, giving total control over extraction but demanding more skill.
Semi-automatic machines use an electric pump for pressure while you control when it starts and stops, making dialing in easier than manual machines. They're the most popular home brewing choice because they balance ease of use with enough control to pull excellent shots.
Fully automatic machines grind, dose, tamp, and pull the shot at the push of a button.
For beginners, a semi-automatic machine with a built-in grinder offers the best starting point. You'll learn the fundamentals without feeling overwhelmed.
Selecting and Preparing Your Coffee Beans
Fresh, quality coffee makes espresso taste dramatically better; stale beans produce flat, bitter shots no matter how well you dial in your machine.
Look for beans roasted within the last two weeks.
Single-origin beans let you taste a specific region's unique characteristics, while blends combine origins for balanced, complex flavor.
Store beans in an airtight container away from light and heat.
Cuppari Coffee's 6 Bean Blend is a meticulous dark roast blend specifically crafted for espresso.
Getting Your Espresso Grind Size Right
Grind size is where espresso success lives or dies.
This is why a burr grinder matters: blade grinders create uneven particles that pull differently, while burr grinders produce uniform grounds for even extraction across the puck.
Start around the middle of your grinder's range and pull a test shot.
The OutIn Fino Portable Electric Coffee Grinder features 28 precise grind levels with stepless micro-adjustment, giving you exact control from espresso-fine to French press coarse.
Measuring Your Dose and Mastering the Brew Ratio
A dose is the dry coffee grounds used for one shot, typically 18-20 grams for a double. Measuring by weight, not by eye, is non-negotiable for consistency.
OutIn Fino Portable Electric Coffee Grinder →
The brew ratio compares input (dry coffee) to output (liquid espresso). A common starting point is 1:2, 18 grams of coffee producing 36 grams of espresso.
Here's a simple baseline recipe to start with:
- Dose: 18 grams of finely ground coffee
- Yield: 36 grams of espresso (1:2 ratio)
- Target shot time: 25-30 seconds from when water first touches the grounds
- Temperature: 200-205°F (93-96°C)
Weigh your dry grounds before tamping, then pull your shot into a cup on a scale and stop at your target yield. This removes guesswork.
Tamping, Pulling Your Shot, and Dialing In
Tamping compresses the grounds into a tight puck so water extracts evenly. Uneven tamping creates channels where water flows faster through loose areas, leading to uneven extraction and sour or bitter shots.
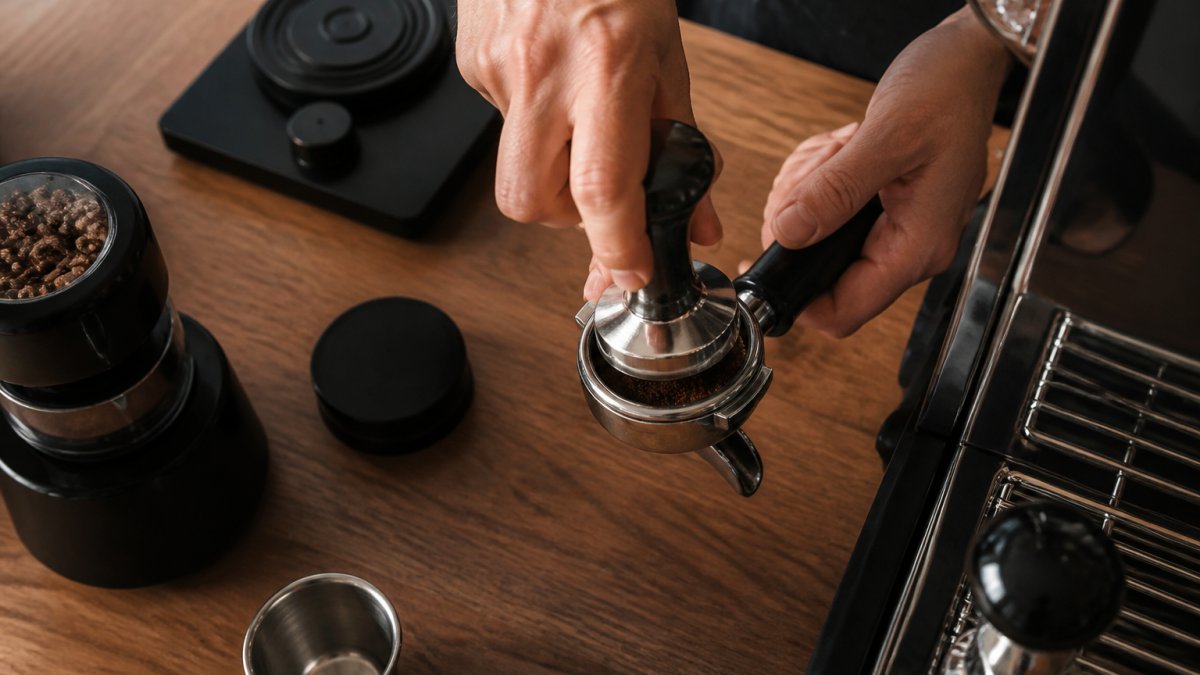
Tamp with firm, even pressure straight down, about 30 pounds of force, enough to require effort but not strain.
Lock the portafilter in and start the pump; water should flow within 1-2 seconds. Watch your yield on a scale and stop at your target weight.
Understanding Espresso Shot Time and Extraction
Shot time is how long water contacts the grounds, most shots run 25-30 seconds from first contact to when you stop the pump.
If your shot runs too slow (over 35 seconds), you're over-extracting and the espresso tastes bitter and harsh.
Dialing in means adjusting your grind until shot time, yield, and flavor hit your target. It's a cycle: pull, taste, observe the time, adjust the grinder, repeat.
How to Make Espresso Without a Machine
You don't need an expensive machine to enjoy espresso-style coffee at home. Several manual methods produce concentrated, rich shots, and for many beginners they're the smarter first purchase because they teach dose, grind, and pressure before you spend on electronics.
The trade-off: manual brewers cost less and take up almost no counter space, but demand more attention per shot. You are the pump, that's the point.
Pick Your Method by What You Actually Want
- Manual lever press (Flair, ROK): Produces true espresso at 6-9 bars of pressure. Best if you want real espresso flavor, plan to travel, or have limited counter space. Expect a 1-2 week learning curve before shots become repeatable.
- Moka pot (stovetop): Produces strong, concentrated coffee at roughly 1-2 bars, not true espresso, but close in flavor and body. Best if you want something nearly foolproof and inexpensive. Not ideal if you're chasing crema or precise ratios.
- AeroPress with a fine metal filter: Produces a concentrated, espresso-adjacent shot at low pressure. Best if you already own one or want the most forgiving option while you learn.
A Beginner Workflow That Works for Any Manual Method
- Heat your water first. Target 200-205°F (93-96°C). For a Moka pot, use preheated water in the base so the grounds don't scorch while the pot comes up to temperature.
- Weigh your dose. 15-18 grams for a lever press or AeroPress; fill the Moka basket level without tamping hard.
- Grind fine and fresh. Espresso-fine for lever presses, slightly coarser for Moka and AeroPress. Grind immediately before brewing.
- Prep the bed. Distribute evenly, then tamp level with moderate pressure. For a Moka pot, level the grounds and wipe the rim, do not tamp.
- Apply pressure or heat. On a lever press, pull down slowly and steadily over 25-35 seconds. On a Moka pot, keep the flame low and remove it as soon as you hear the gurgle.
- Weigh your yield. Aim for 30-40 grams of liquid output from an 18-gram dose. Stop when you hit target weight, not when the stream turns pale.
- Clean up immediately. Rinse the basket, wipe the group or chamber, and dry metal parts to prevent mineral spotting.
A Simple Decision Tree
- Shot tastes sour and thin? Grind finer or increase pressure/time.
- Shot tastes bitter and harsh? Grind coarser or reduce pressure/time.
- Shot runs through in under 20 seconds? Grind finer.
- Shot stalls or barely drips? Grind coarser.
- Flavor is muddy or inconsistent shot to shot? Your tamp or dose is varying, weigh and level every time.
Once you can pull a repeatable shot manually, moving to a semi-automatic machine feels easy, you already understand what it's doing for you.
Water Quality, Machine Maintenance, and Common Mistakes
Water is roughly 98% of your espresso by weight, so it deserves more attention than most beginners give it. So does the routine that keeps your machine alive and your shots tasting clean.
What Good Espresso Water Looks Like
You don't need lab equipment. You need water that isn't fighting your coffee.
- Avoid straight tap water in most areas. Chlorine flattens flavor; heavy minerals scale your boiler; very soft water can taste flat and extract unevenly.
- Filtered water is the practical default. A simple carbon filter pitcher removes chlorine and most off-flavors. Machine-mounted filters go further if your water is hard.
- A common target range used by many home brewers is roughly 50-150 ppm total dissolved solids, with moderate alkalinity. If your water is far outside that, a filter or a mix of filtered and bottled water will noticeably improve flavor.
- Never use distilled water alone. It lacks the minerals that help extraction and can taste hollow.
A Maintenance Cadence You Can Actually Keep
- After every session: Purge the group head for 2-3 seconds to clear old grounds. Wipe the steam wand immediately after steaming so milk doesn't bake onto it.
- Weekly: Backflush with a blind basket (no holes) to push water backward through the group head. If your machine supports it, use espresso-machine detergent every few weeks.
- Every 1-3 months: Descale with a solution made for espresso machines. Hard water means closer to monthly; soft water means you can stretch it. Run it through the group head and steam wand, let it sit per the product instructions, then flush with fresh water until there's no smell or residue.
- Daily: Empty and rinse the drip tray and water reservoir. Stale water tastes stale.
The Beginner Mistakes That Cost You the Most
- Using pre-ground coffee. It loses its best flavors within days. Grind immediately before each shot.
- Skipping the scale. Eyeballing dose and yield is the single biggest cause of inconsistent shots. Weigh both.
- Tamping unevenly. A tilted tamp creates channels where water races through. Keep the tamper level and use steady, moderate pressure.
- Not purging the group head. Old residue contaminates the next shot.
- Ignoring water quality. Filtered water is one of the cheapest upgrades you can make.
- Chasing time instead of taste. Shot time is a guide, not a goal. If a 32-second shot tastes better than a 27-second shot, the 32-second shot wins.
- Changing multiple variables at once. Adjust one thing, usually grind, then pull another shot.
A Repeatable Beginner Workflow, Start to Finish
- Fill the reservoir with filtered water and turn the machine on to warm up (most machines need 10-20 minutes).
- Weigh 18 grams of freshly ground coffee into your portafilter basket.
- Distribute and tamp level with moderate, even pressure.
- Purge the group head for 2-3 seconds, then lock in the portafilter.
- Place a cup on a scale and start the pump.
- Stop at 36 grams of yield (a 1:2 ratio) or when the shot turns pale and blond, whichever comes first.
- Taste, note the time, and adjust one variable, almost always grind, before the next shot.
- Purge, rinse the basket, wipe the wand, and empty the drip tray before you walk away.
Frequently Asked Questions
What grind size should I use for espresso?
Espresso requires a fine grind, similar to table salt or finer. Start with a fine setting on your grinder and adjust based on your shot time. If your espresso pulls too fast (under 25 seconds), go finer. If it pulls too slow (over 35 seconds), go coarser. The OutIn Fino Portable Electric Coffee Grinder offers 28 grind levels with micro-adjustment, making it easy to dial in the perfect consistency for your espresso machine.
How much coffee should I use for a double shot of espresso?
A standard double shot uses 18-20 grams of coffee grounds, yielding about 36-40 milliliters of brewed espresso. This is your baseline dose. Measure your coffee on a scale for consistency, then adjust slightly based on your machine and desired strength. If your espresso tastes weak or sour, increase the dose. If it tastes bitter or pulls too slowly, reduce it slightly.
How long should an espresso shot take to brew?
A properly extracted espresso shot takes 25-35 seconds from the moment you start pulling. This timing produces balanced flavor and proper body. Shots that pull faster than 25 seconds are under-extracted and taste sour or thin. Shots over 35 seconds are over-extracted and taste bitter. Use a timer to track your brew time, then adjust your grind size to hit this window consistently.
Can I make espresso without an espresso machine?
Yes. A Moka pot (stovetop espresso maker) produces a strong, concentrated coffee similar to espresso without an electric machine. Fill the bottom chamber with water, add finely ground coffee to the basket, screw on the top chamber, and heat on medium until you hear a hissing sound. A French press or AeroPress can also create concentrated coffee, though the pressure and body differ from true espresso. These methods are budget-friendly alternatives for home brewing.