

Table of Contents
- Why Roasting Coffee Beans at Home Is Worth It
- Methods for Roasting Coffee Beans at Home
- Best Home Coffee Roaster Machines for Beginners
- Coffee Roasting Temperature Chart: Key Stages
- How to Store Freshly Roasted Coffee for Peak Flavor
- Safety and Ventilation When Roasting at Home
- Conclusion
- Frequently Asked Questions
Last Updated: September 18, 2026
Why Roasting Coffee Beans at Home Is Worth It
Roasting coffee beans at home is the practice of heating green coffee beans to create the flavors, aromas, and colors you taste in a finished cup. This guide from Cuppari Coffee walks through the gear, temperatures, and timing you need to get it right.
The payoff is freshness you cannot buy off a shelf. Once beans are roasted, they begin losing aroma within days. When you roast coffee beans at home, you control exactly when that clock starts.
There is also a cost angle. Green coffee beans often cost less per pound than roasted beans. That gap adds up fast if you drink coffee daily.
And then there is the flavor. You pick the origin, the roast level, and the rest time. No one else decides for you.
Below, we cover the methods, the machines worth buying, the temperature stages, and how to store what you roast.
Methods for Roasting Coffee Beans at Home
The best method for roasting coffee beans at home depends on your budget, your batch size, and how much control you want. Every method uses the same basic idea: apply steady heat, keep the beans moving, and listen for the cracks.
Stovetop and Oven Roasting
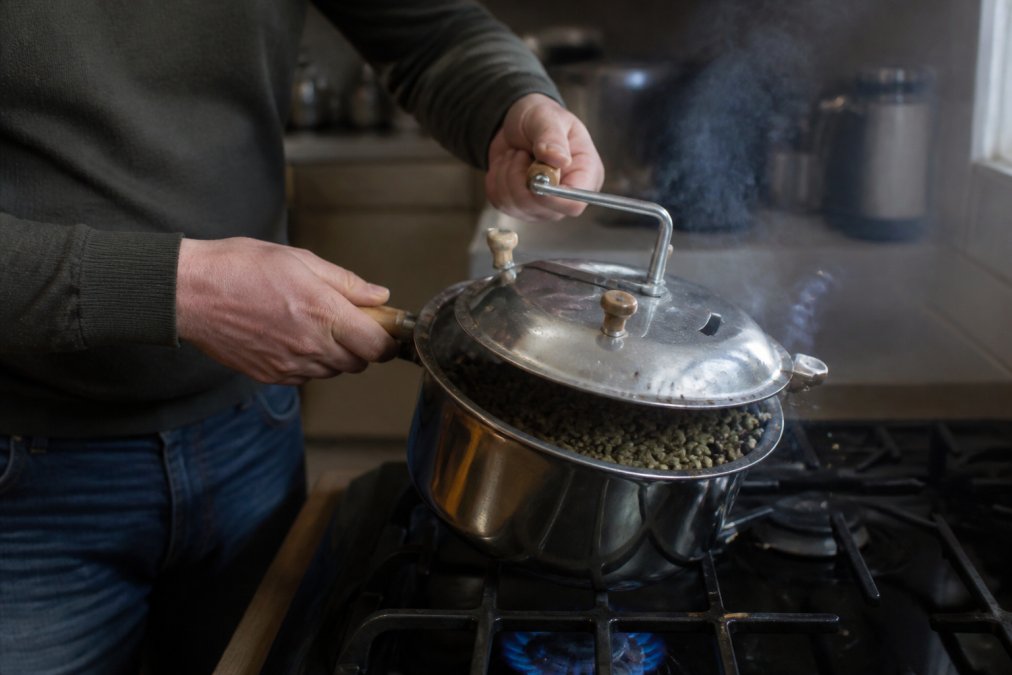
Stovetop roasting is the cheapest way in. A popcorn popper, a cast-iron skillet, or a Whirley Pop works fine. You heat the pan, add green beans, and stir constantly.
Oven roasting is simpler but slower. Spread beans on a sheet pan and roast at high heat, stirring every few minutes.
Both methods rely on conduction and some convection. The pan transfers heat directly, while hot air moves around the beans.
The downside? You cannot see color changes well, and smoke builds up fast. Ventilation matters here.
Air Roasters and Drum Machines
Air roasters use forced hot air to roast beans. They are fast and give you more even results than a pan.
Drum machines use a rotating roasting drum with a roasting drum design that tumbles beans over a heat source. These give you the closest thing to professional control.
Both let you track bean temperature and adjust heat as you go. That control is what separates a decent roast from a great one.
Best Home Coffee Roaster Machines for Beginners
The best home coffee roaster machines for beginners balance price, batch size, and ease of use. You do not need a commercial setup to get good results, but you do need to understand the three machine families before you spend money, because each one roasts beans differently and produces a different ceiling on quality.
The Three Machine Families
Fluid-bed air roasters. These push a column of hot air through the bean mass, lifting and tumbling the beans while they roast. The same airflow that agitates the beans also carries away chaff and smoke, which is why they are the friendliest starting point. They roast fast, often finishing a batch in 6 to 12 minutes, and they are compact and easy to clean. The trade-off is batch size: most consumer air roasters handle only 2 to 5 ounces of green coffee per cycle, and the fan noise makes it harder to hear first crack.
OutIn Fino Portable Electric Coffee →
Drum roasters. A rotating metal drum tumbles beans over a heat source, mimicking the conduction-plus-convection profile of a commercial roaster. Drum machines give you the closest thing to professional control: you can adjust heat and airflow independently, track bean temperature, and stretch or shorten development time. They cost more, take longer to warm up, and require more attention to chaff and smoke management. If you plan to roast weekly, the extra control pays off.
Stovetop and oven rigs. A popcorn popper, cast-iron skillet, or Whirley Pop is the cheapest way in.
What Beginners Actually Need
- A machine with adjustable heat and a visible temperature readout
- A batch size between 100 and 300 grams (roughly 3.5 to 10.5 ounces)
- A cooling tray or a way to cool beans fast, beans keep roasting off the heat until they drop below about 150°F
- Easy chaff collection, since chaff is light, messy, and flammable
- A way to hear or see first crack clearly
A Common Mistake
Buying a large machine before you know your preferred roast level is the most common beginner error. A 1-pound drum roaster is wasted if you only drink a few cups a week, because roasted beans fade within 2 to 4 weeks. Start small, learn your taste, then upgrade.
Coffee Roasting Temperature Chart: Key Stages
The coffee roasting temperature chart below shows the stages every roast passes through. Temperature and time together shape acidity, body, and aroma.
| Stage | Bean Temperature | What Happens |
|---|---|---|
| Drying | 160-300°F | Moisture leaves the bean |
| Maillard reaction | 300-390°F | Sugars brown, flavor builds |
| First crack | 385-400°F | Beans pop, expand, and crack |
| Development | 400-435°F | Roast level is set here |
| Second crack | 435-450°F | Oils surface, smoke increases |
How to Store Freshly Roasted Coffee for Peak Flavor
How to store freshly roasted coffee matters as much as the roast itself, but storage is only half the story. The other half is learning to taste what you roasted, so you can tell whether your storage and roast choices are actually working. Most home-roasting guides stop at the mechanics of heat and never teach you how to evaluate the cup. This section covers both.
Degassing and Storage Basics
Beans release carbon dioxide for days after roasting, a process called degassing. Wait 3 to 7 days before brewing for the best flavor. Store beans in an airtight container away from light, heat, and moisture. A one-way valve bag lets gas escape without letting oxygen in.
- Keep beans at room temperature, not the fridge
- Use within 2 to 4 weeks of roasting
- Buy green coffee in batches you will finish
How to Taste and Evaluate Your Roast
Cupping is the industry-standard method for evaluating coffee, and you can do a simplified version at home with nothing more than a scale, a grinder, hot water, and a spoon.
A simple home cupping routine:
- Weigh 8.25 grams of coffee per 5 ounces of water, the same ratio the Specialty Coffee Association uses for professional cupping.
- Grind coarse, like sea salt.
- Pour water just off a boil (about 200°F) over the grounds and let it steep for 4 minutes.
- Break the crust with a spoon, smell the released aromatics, then skim the foam.
- Slurp from a spoon so the coffee hits your whole palate, and note what you taste.
- Acidity, the bright, juicy sensation. High acidity usually means a lighter roast or a faster roast. If it tastes sharp or sour, you likely pulled the beans too early.
- Body, the weight and texture on your tongue. Thin body often means underdevelopment; syrupy body usually means a longer development time.
- Sweetness, the caramelized sugar flavor from the Maillard reaction. Weak sweetness points to a rushed Maillard stage.
- Bitterness and ash, if the cup tastes ashy or burnt, you pushed past second crack or let development run too long.
- Aroma, smell the grounds before and after adding water. Flat aroma is the first sign beans are past their prime.
Turn Tasting Into a Log
If you would rather skip the roasting and storage work, Cuppari Coffee roasts only after you order and ships the same day. That means your beans arrive near peak freshness, not weeks old.
Safety and Ventilation When Roasting at Home
Roasting coffee beans at home produces a lot of smoke. The smoke point arrives during first crack and gets heavy near second crack. Without ventilation, that smoke sets off alarms and coats your kitchen.
Conclusion
Roasting coffee beans at home takes practice, but the reward is a fresher, more personal cup. The learning curve is short once you understand the temperature stages and your own taste.
Frequently Asked Questions
Is roasting your own coffee beans worth it?
Yes, for many coffee lovers. Freshly roasted beans peak in flavor 3-7 days after roasting, and home roasting lets you control that window. You also save money per pound compared to specialty roasters, though you will invest in equipment upfront. The trade-off is time and a learning curve. If you drink coffee daily and enjoy tinkering, it is worth trying.
What equipment do I need to start roasting coffee at home?
You need a heat source and a way to agitate beans. Beginners often start with a stovetop popcorn popper, a sheet pan for oven roasting, or an air roaster. You will also want a thermometer, a colander for cooling, and a scale. For grinding after roasting, a consistent grinder like the OutIn Fino Portable Electric Coffee Grinder helps you match grind size to your brew method.
How long does it take to roast raw coffee beans?
Most home roasts take 10-20 minutes depending on method and batch size. Stovetop and oven roasting tend to run longer, while air roasters can finish in 8-12 minutes. You will hear first crack around 8-12 minutes and second crack a few minutes later. Aim to finish before second crack for most brew methods. Always cool beans immediately after roasting to stop the process.
What are the different roast levels for coffee beans?
Roast levels range from light to dark. Light roasts stop just after first crack, preserving acidity and origin character. Medium roasts finish between first and second crack, balancing sweetness and body. Dark roasts reach or pass second crack, developing smoky, bittersweet notes. Each level suits different brewing methods and taste preferences. A coffee roasting temperature chart can help you target the right internal bean temperature for each level.