

Last Updated: November 7, 2026
Quick Summary
Espresso extraction troubleshooting starts by reading your shot's taste, time and flow, since sour usually means under-extracted and bitter usually means over-extracted. Lock your dose, yield and beans, then change only the grind one small step at a time until taste balances.
- Sour, thin shots are under-extracted; bitter, harsh shots are over-extracted.
- Aim for roughly 25 to 30 seconds as a starting target, treating it as a guide.
- Start with a brew ratio near 1:2, such as 18 grams in and 36 grams out.
- Change only one variable per shot and log dose, yield, grind, time and taste.
- Channeling can make a shot sour and bitter at once, so fix puck prep before grinding.
Table of Contents
- How Espresso Extraction Works and What Your Shot Is Telling You
- Set Up a Repeatable Baseline: Dose, Yield and Shot Timer
- Espresso Troubleshooting Chart: Symptom to Adjustment Matrix
- How to Fix Sour Espresso
- Espresso Troubleshooting Wet Puck: Distribution, Tamping and Channeling
- Coffee Age, Roast, Water and Machine Differences That Skew Results
- Your Next Shot: Logging Changes and Dialing In at Home
- Frequently Asked Questions
How Espresso Extraction Works and What Your Shot Is Telling You
Espresso extraction troubleshooting starts with one idea: water pulls flavor from grounds, and how it does that shows up in your cup.
Extraction means dissolving coffee compounds into water. Under-extraction leaves the shot sour and thin; over-extraction leaves it bitter and dry. The goal is a balanced middle.
Your shot tells you three things to watch:
- Taste: Sour means under-extracted. Bitter or harsh means over-extracted.
- Time: How long the shot runs from start to finish.
- Appearance: The color and flow of the liquid as it lands in the cup.
Read these three signals together and you can diagnose most problems without guessing. For a full walkthrough of pulling espresso at home, see the home-brewing basics guide.
Set Up a Repeatable Baseline: Dose, Yield and Shot Timer
Before changing anything, you need a baseline: one recipe you can repeat exactly. Without it, you cannot tell whether a change helped.
Set up four things and keep them fixed for every shot:
- Dose: The grams of ground coffee in the basket.
- Yield: The grams of espresso in the cup.
- Brew ratio: Yield divided by dose. A common starting point is about 1:2, so 18 grams in and 36 grams out.
Use a scale for dose and yield (Metric Kitchen: Cookware and Tools | NIST). Weighing beats guessing and makes your notes useful later.
Aim for roughly 25 to 30 seconds as a starting target, treating it as a guide since beans and machines differ.
Espresso Troubleshooting Chart: Symptom to Adjustment Matrix
Use this chart to match what you taste and see with the most likely cause and the next single change to make. If you are weighing whether a dedicated espresso grinder is worth the cost for precise grind changes, read this first.
| Symptom | Likely Cause | First Adjustment | What to Hold Steady |
|---|---|---|---|
| Sour, thin, fast shot | Under-extracted; water passed through too quickly | Grind finer in one small step | Dose, yield, basket, beans |
| Bitter, harsh, dry shot | Over-extracted; water stayed in contact too long | Grind coarser in one small step | Dose, yield, basket, beans |
| Shot runs very fast (under about 20 seconds) | Grind too coarse, or dose too low for the basket | Grind finer; confirm dose fills the basket | Yield target, tamp pressure |
| Shot runs very slow (over about 40 seconds) or drips | Grind too fine, dose too high, or basket overloaded | Grind coarser first; only then reduce dose | Yield target, distribution method |
| Watery, weak, no body | Yield too high for the dose, or grind too coarse | Reduce yield toward a 1:2 ratio, then grind finer | Dose, shot time target |
| Channeling, spurts, uneven blonding | Puck prep defect; water found a weak path | Improve distribution and level tamp before changing grind | Grind setting, dose |
| Gushing then stalling, or pressure spikes | Channel formed, then fines migrated and blocked flow | Re-check puck prep; then adjust grind one step | Dose, basket |
| Consistent sour plus bitter in one cup | Uneven extraction from channeling, not a simple grind error | Fix distribution and tamp; re-pull before grinding | Grind setting, dose, yield |
How to read flow rate, not just time. Shot time alone can mislead.
A controlled, repeatable dial-in workflow. This is what separates guessing from dialing in.
- Lock dose. Pick a dose that fills your basket without touching the shower screen, commonly 16 to 18 grams in a standard double basket, but confirm against your own. Do not change it during this phase.
- Lock yield. Choose a target at roughly 1:2 (for example, 18 grams in, 36 grams out). Weigh the cup and stop the shot at target weight.
- Change only grind. Pull a shot, record time and taste, then move grind one small step finer or coarser per the chart. Repeat until taste balances and time lands near your target window.
- Adjust ratio only after grind is dialed. If the shot tastes balanced but too intense or weak, change yield (for example, 1:2 to 1:2.5) rather than grind.
- Change dose last. Only revisit dose if the basket is clearly under- or over-filled, since dose also changes puck depth and flow.
Watch out: Changing grind, dose, and yield in the same shot makes it impossible to know which change helped.
Coffee age, roast, and water as confounders. Before blaming your technique, rule these out.
Beginner-friendly measurement and logging. You do not need advanced equipment, a basic digital scale accurate to 0.1 grams and a phone timer suffice.
How to Fix Sour Espresso
Sour espresso is the most common beginner complaint. It usually means the shot ran too fast and did not pull enough flavor from the coffee.
Follow these steps in order:
- Weigh your dose and yield, and time the shot.
- Grind one step finer, then pull a new shot with the same dose and yield.
- Check whether the shot time moved toward 25 to 30 seconds.
- If the shot is still sour, grind finer again in small steps.
- Stop when the taste balances and the shot falls in your target time.
Watch out: Do not fix sourness by raising the water temperature or adding more coffee on the first try. Those changes stack with the grind and make it hard to tell what worked.
Espresso Troubleshooting Wet Puck: Distribution, Tamping and Channeling
A wet puck is the spent coffee left in the basket after a shot.
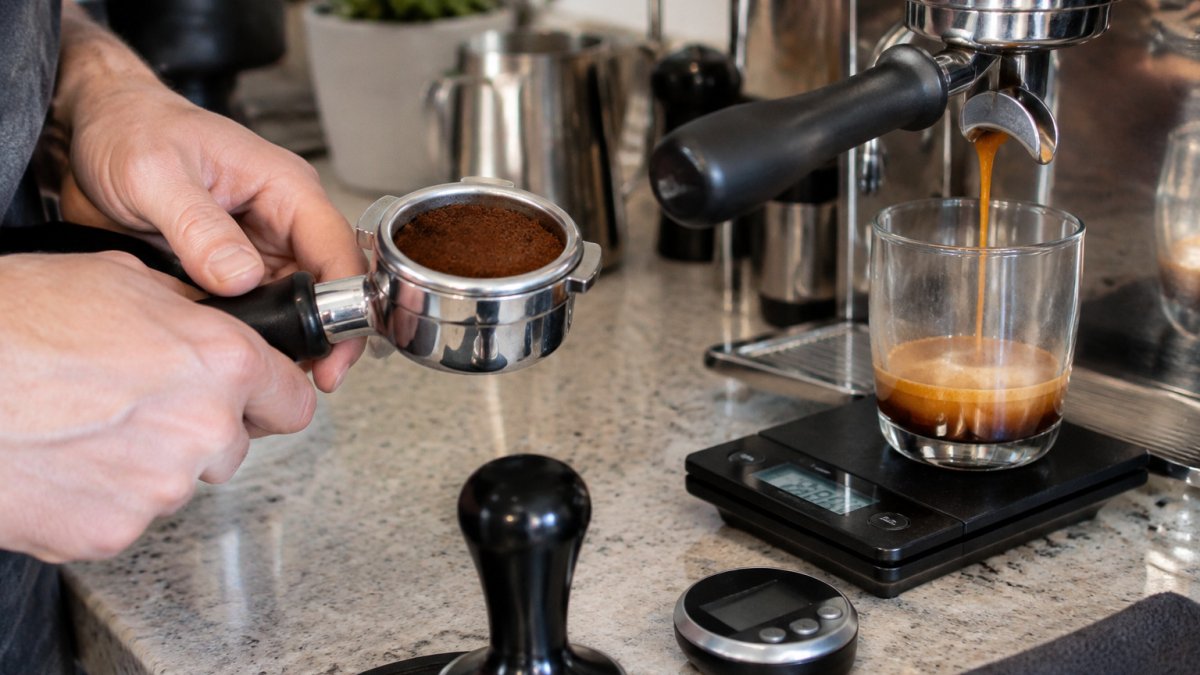
What channeling is and why it ruins a shot. Water takes the path of least resistance.
Signs of channeling during the shot. Watch the bottom of the portafilter and the stream:
- Spurts or jets of espresso shooting sideways or at an angle instead of falling straight.
- Blonding in patches, some areas of the basket turn pale and watery while others stay dark.
- An uneven or lopsided pour where one side of the basket flows much faster.
If you see any of these, stop adjusting grind.
Practical distribution checks. Distribution is about getting an even density of grounds across the basket before tamping.
- Level the bed first. After dosing, tap the portafilter gently to settle grounds, then level with a distribution tool or by tapping the side and smoothing with a finger. Aim for a flat, even bed with no mounds or divots.
- Check for clumps. Break up clumps before tamping; they create dense and loose zones that channel water.
- Confirm dose fits the basket. An under-filled basket leaves headspace that lets water disturb the bed; an over-filled one can press grounds into the shower screen. Dose so the tamped puck sits below the rim with a small gap.
Practical tamping checks. Tamping is not about force, it is about consistency and levelness.
-
Tamp straight and level. A tilted tamp creates a wedge of uneven density, and water finds the thin side. Rest the portafilter on a stable surface and tamp with the base parallel to the basket rim.
-
Use steady, moderate pressure. Enough to fully compress the bed and seal the edges; more pressure does not improve the shot and can mask an uneven bed.
-
Wipe the rim. Loose grounds on the rim prevent a clean seal at the group head and let water bypass the puck entirely, a channel around the edge, not through the coffee.
-
Even, flat, firm puck: Prep is working; grind adjustments will do the rest.
-
Holes, craters, or a divot: Water channeled through weak spots. Improve distribution and level the tamp.
-
Lopsided or sloped puck: Tamp was not level, or the basket was not seated properly.
-
Soupy or very wet puck with a fast shot: Often under-dosing or a coarse grind letting water pass too quickly; check dose against basket size first.
Coffee Age, Roast, Water and Machine Differences That Skew Results
Sometimes your recipe is correct and the shot still tastes off. Several variables can change results without any change on your part.
- Coffee age: Fresh beans release gas and behave differently for the first days after roasting; too-old beans lose flavor and taste flat. Many home brewers find beans rested several days after roasting easier to dial in.
- Roast level: Darker roasts extract differently than lighter roasts. When you switch beans, expect to re-dial your grind.
- Water: Different mineral content changes extraction. Use consistent water while dialing in.
- Machine and basket: Different machines and baskets change flow and pressure. A recipe that works on one machine may need adjustment on another.
When your results shift, check these before blaming your technique. If you suspect your machine itself is skewing results, home espresso machine cleaning tips explain how cleaning and maintenance affect extraction. Keep the beans, machine, and water the same while you dial in a new recipe.
Your Next Shot: Logging Changes and Dialing In at Home
Keep a simple log so every shot teaches you something. For each shot, record:
- Date and bean name
- Dose and yield in grams
- Grind setting
- Shot time in seconds
Review the log after several shots. Patterns show up quickly, and you can see which change improved the cup.
A simple routine for your next shot:
- Start from your baseline recipe.
- Change only grind size.
- Pull the shot and log the result.
- Adjust one variable at a time until taste balances.
With repetition, you will stop guessing and start tuning. That is the real goal of espresso extraction troubleshooting: a repeatable shot you can trust.
Ready to put these steps into practice with fresh beans? Cuppari Coffee roasts every order after you place it and ships the same day, so your beans are fresh when you start dialing in at home.
Frequently Asked Questions
Why does my espresso taste sour?
Sour espresso usually means the shot is under-extracted, meaning water passed through the coffee too quickly to pull out enough flavor. The most common fix is to grind finer, which slows the flow and increases contact time. Check that your shot time is roughly 25 to 30 seconds for a standard double shot. If the shot still runs fast after grinding finer, check your dose and tamping, since a light dose or uneven puck can let water channel through.
Why does my espresso taste bitter?
Bitter espresso is typically over-extracted, meaning the shot ran too long or pulled too much from the grounds. Try grinding slightly coarser to speed the flow, or reduce your dose or increase your yield so the shot finishes sooner. Taste the shot after each single change so you can see which adjustment actually improved the cup. Stale or very dark roasts can also taste bitter, so compare against a fresher bag before changing too many variables.
What is a good espresso extraction time for beginners?
For most home espresso, a good starting target is about 25 to 30 seconds from the first drip to finishing a double shot, with a yield of around 36 grams from an 18-gram dose, a 1:2 brew ratio. Use a scale and timer so you can repeat the same numbers each time. If your shot falls outside this window, adjust grind size first, since it has the largest effect on flow rate. Treat the time as a guide and let taste make the final call.
How do I fix espresso that runs too fast?
A shot that runs too fast, finishing in under 20 seconds, usually needs a finer grind to slow water flow. Make one small grind adjustment at a time and re-time the shot. Also confirm your basket is not overfilled and that your tamp is level and firm. Fast shots often taste sour or thin, so pair the timing check with a taste check on the next shot.
How do I fix espresso that runs too slowly?
A shot that runs too slowly, taking longer than about 35 seconds, often needs a coarser grind to let water flow more freely. A slow shot can also come from too much coffee in the basket or a very hard tamp, so weigh your dose and reduce pressure if needed. Adjust one variable at a time and log each result. Slow shots commonly taste bitter, harsh or muddy.
