

Last Updated: October 29, 2026
Quick Summary
Milk frothing is the process of adding air to cold milk and folding it in until it forms a glossy, pourable microfoam. Start with cold milk, aerate for a few seconds near the surface, then submerge the tip and spin the milk until the pitcher is too hot to hold. Pull the wand at 140°F, since the milk keeps cooking after you stop.
- Fill the pitcher no more than half full so the milk has room to expand and spin.
- Aerate 3-5 seconds, then raise the pitcher so the steam tip submerges.
- Whole dairy milk makes the best foam thanks to its fat and protein balance.
- Keep milk frothing temperature in the 140-150°F window and pull the wand at 140°F.
- Oat milk needs only 2-3 seconds of aeration and should stop steaming at 135-140°F.
Table of Contents
- Why Milk Frothing Makes or Breaks an Espresso Drink
- How to Steam Milk for a Latte: Step-by-Step
- The Best Milk for Frothing: Dairy vs. Plant-Based
- Milk Frothing Temperature: The 140-150°F Window
- How to Froth Milk Without a Machine
- Troubleshooting by Machine Type: Bubbly, Flat, or Burnt Foam
- Cleaning Your Steam Wand (and Why It Changes Foam Quality)
- Stock Your Home Bar: Tools and Fresh Beans
- Frequently Asked Questions
Why Milk Frothing Makes or Breaks an Espresso Drink
Great espresso is only half the drink. The other half is milk, and how you froth it decides whether you get a silky latte or hot coffee with sad bubbles on top.
Here is the part most guides skip: the mistakes below are small. A wand tip a centimeter too deep. Milk that sat in the fridge door. A pitcher rinsed but not dried.
How to Steam Milk for a Latte: Step-by-Step
If you want to know how to steam milk for a latte, the short version is this: start with cold milk, aerate for a few seconds near the surface, then submerge the tip and spin the milk until the pitcher is too hot to hold.
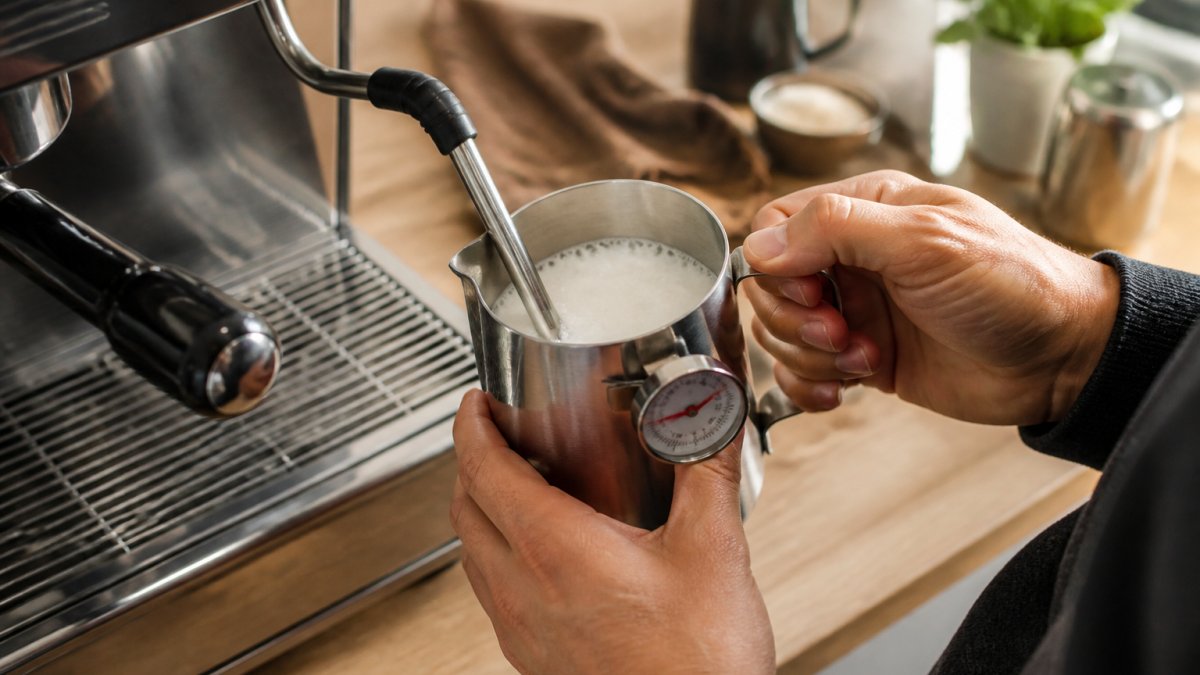
Here is the sequence we teach, with the specific cues to watch and listen for at each stage:
- Fill the pitcher to just below the spout. For a 12 oz drink, use about 6-7 oz of cold milk. The pitcher should be no more than half full so the milk has room to expand and spin.
- Purge the steam wand for one second. This clears condensation; skip it and the first burst of steam is wet and dilutes the milk.
- Place the wand tip just under the surface, slightly off-center. About a quarter inch below the surface, toward the side opposite your pouring hand. Off-center placement starts the rotation.
- Open the steam and listen for a soft hiss, not loud sputtering. Aim for the sound of tearing paper. A violent screech means the tip is too deep; big gulping bubbles mean it is too shallow.
- Aerate for 3-5 seconds, then raise the pitcher so the tip submerges. Three seconds for a small 6 oz pitcher of oat milk, up to 5 seconds for 8 oz of whole dairy. After this window, you are folding, not adding air.
- Keep the milk spinning in a whirlpool until it reaches temperature. If the milk stops spinning, adjust the pitcher angle a few degrees.
- Tap the pitcher on the counter and swirl before pouring. Tapping breaks large bubbles; swirling re-integrates the foam for wet-paint texture instead of a dry cap.
Pitcher Position, Angle, and the Whirlpool
The whirlpool is the whole trick. Hold the pitcher at a slight tilt, maybe 15 to 20 degrees, so the steam enters off-center.
A spinning whirlpool pulls air down into the milk and keeps the foam moving so it doesn't separate.
Keep the tip about a half inch under the surface once you finish aerating. Any deeper and you stop adding air.
Timing by Milk Volume and Machine Type
Aeration time is not one-size-fits-all. A two-hole commercial tip moves more air per second than a single-hole home wand, so it needs less time at the surface.
- Small home machine (single-hole wand, 6 oz milk): aerate 4-5 seconds, then submerge and spin until 140°F.
- Prosumer or commercial wand (two-hole tip, 8 oz milk): aerate 2-3 seconds, then submerge and spin until 140°F.
- Panarello-style wand (the plastic sleeve with air holes): aerate for the full steam time; the sleeve mixes air automatically, so focus on keeping the tip submerged and the milk moving rather than on a distinct aeration window.
If your machine has a panarello wand, you cannot control aeration by tip depth the same way, so you control it by how long you run the steam and how deep the sleeve sits.
The Wet-Paint Texture: What to Look For
When the milk is done, it should look like wet paint: glossy, uniform, with no visible large bubbles and no dry foam on top. Tilt the pitcher and it should flow like heavy cream. A distinct layer of white foam means you aerated too long or did not swirl enough; thin and watery means too little aeration or the milk got too hot.
The Best Milk for Frothing: Dairy vs. Plant-Based
Whole dairy milk is the best milk for frothing. Its fat and protein content creates strong, stable microfoam with a natural sweetness. Skim milk froths easily too but gives thinner, drier foam. Two percent is a solid middle ground.
Plant-based milks vary wildly. Some froth well, others turn into hot water with grit. The difference comes down to protein content and added stabilizers.
| Milk Type | Foam Quality | Best For | Watch Out For |
|---|---|---|---|
| Whole dairy | Excellent, stable | Latte art, cappuccino | Scalds easily above 155°F |
| 2% dairy | Good, slightly drier | Everyday lattes | Less sweet finish |
| Skim dairy | High volume, stiff | Dry cappuccino | Thin mouthfeel |
| Oat milk | Good, creamy | Flat whites, lattes | Can taste oaty if overheated |
| Almond milk | Fair, separates fast | Small drinks | Splits in high heat |
| Soy milk | Good, stable | Cappuccino | Can curdle with acid coffee |
Oat Milk and Other Plant-Based Techniques
Oat milk is the closest plant-based match for dairy, but it needs a gentler hand. Aerate for less time, maybe 2-3 seconds, and keep the temperature lower. Oat milk scorches fast and turns bitter.
Oat milk specifics:
- Use barista-style oat milk for latte art. Standard oat milk foams but the texture is closer to a bubble bath than wet paint.
- Aerate for 2-3 seconds, not 4-5. Oat milk absorbs air faster than dairy and turns stiff if over-aerated.
- Stop steaming at 135-140°F. Above 145°F it develops a bitter, oaty off-flavor.
Almond milk specifics:
- Low protein and low fat, so it separates quickly under heat. Use it for small drinks you will drink right away.
- Aerate for only 1-2 seconds and keep the steam gentle; a hard whirlpool breaks the emulsion.
- Pour immediately. Almond foam collapses within about 30 seconds.
Soy milk specifics:
- Highest protein content of the common plant milks, which is why it foams well. But soy protein curdles in the presence of acid, so it can separate with bright or acidic espresso.
- Aerate for 3-4 seconds and steam to 140°F. Soy holds foam better than almond but less well than barista oat.
- If you notice curdling, try a lower-acid coffee or add the milk more slowly to the shot.
Dairy Milk: Fat, Protein, and Temperature
Dairy milk foams because its proteins (casein and whey) unfold at the surface and trap air, while fat globules coat the bubbles and keep them from collapsing. Whole milk has the best balance: enough fat for stability and enough protein for structure. Skim milk has more protein by volume but no fat to stabilize the foam, so it produces stiff, dry foam that works for a dry cappuccino but not a glossy latte.
Milk Frothing Temperature: The 140-150°F Window
Milk frothing temperature is the single most common failure point. The target window is 140-150°F.
Use a thermometer. The Barista Basics 7" Large Steaming Thermometer clips onto the pitcher and shows the target range right on the dial.
Pull the wand at 140°F. The milk keeps cooking for a few seconds after you stop, so it lands right in the window.
How to Froth Milk Without a Machine
No steam wand? You have options. Learning how to froth milk without a machine comes down to three methods, and all of them work with cold milk.
- Handheld electric frother: The OutIn LattoGo uses a dense mesh whisk to build stable foam, and its adjustable angle controls how much air gets in. It's $49.99.
- French press: Add cold milk, pump the plunger 20-30 times, then microwave in short bursts.
- Jar method: Fill a jar halfway, shake hard for 30 seconds, then microwave 30-45 seconds.
A common mistake with all three: overheating. Microwave in 15-second bursts and check the temperature each time.
Troubleshooting by Machine Type: Bubbly, Flat, or Burnt Foam
Different machines fail in different ways. Match the fix to your setup.
Bubbly foam usually means too much air too fast. On a powerful machine, crack the steam valve open slowly.
Flat foam points to too little aeration or milk that's too warm to start. Cold milk froths better, so skip the fridge-door stash and use the back of the fridge.
Burnt foam means the wand sat still in one spot. If your foam comes out flat no matter what you try, our guide to the causes of flat latte art foam breaks down the specific fixes.
Cleaning Your Steam Wand (and Why It Changes Foam Quality)
A dirty wand cannot make clean foam. Milk residue bakes onto the tip and blocks the steam holes, causing sputtering, uneven pressure, and a burnt taste.
Once a week, soak the tip in a milk-specific cleaning solution. For a full walkthrough, see our home espresso machine cleaning tips. Never use a paper towel to scrub a hot wand, because it can leave fibers behind.
Stock Your Home Bar: Tools and Fresh Beans
You can master the technique and still get a mediocre drink if the beans are old. Espresso needs fresh coffee. Our best coffee beans for home espresso rounds up top picks to pair with your drinks.
That's where Cuppari Coffee comes in. We roast your beans only after you order and ship the same day. Free shipping applies on all U.S. orders.
Your shopping list:
- A stainless steel pitcher, sized to your drink
- A clip-on thermometer
- A microfiber cloth for the wand
Frequently Asked Questions
How do you froth milk for espresso drinks?
Start with cold milk in a stainless steel pitcher, submerge the steam wand tip just below the surface, and turn on the steam. Lower the pitcher slightly to introduce air (aeration) for 2-3 seconds, then raise it to create a whirlpool and incorporate the foam. Keep the tip submerged until the pitcher is too hot to hold, or until a thermometer reads 140-150°F. Tap the pitcher to break large bubbles.
What is the best milk for frothing?
Whole dairy milk froths most easily because its fat and protein content stabilizes bubbles and creates a glossy finish. For plant-based options, oat milk and soy milk perform best due to added oils and higher protein. Almond and coconut milk tend to stay thin unless they contain added stabilizers. Use cold milk straight from the refrigerator.
How hot should milk be for espresso drinks?
Aim for a milk frothing temperature between 140°F and 150°F. Use a clip-on thermometer like the Barista Basics 7-inch steaming thermometer to stay precise. If you don't have a thermometer, steam until the pitcher is just too hot to hold comfortably, then stop immediately and swirl before pouring.
Can you froth milk without an espresso machine?
Yes. You can froth milk without a machine using a handheld electric frother, a French press, or a jar with a tight lid. Warm the milk to 140-150°F, then whisk or shake vigorously until foam forms. The OutIn LattoGo ($49.99) uses a dense mesh whisk to build foam. For a low-tech option, pump a French press plunger 20-30 times, then tap and swirl the pitcher before pouring.
The gap between a good espresso drink and a great one is usually the milk, not the machine. If your beans are the weak link, Cuppari Coffee roasts to order and ships the same day, with free shipping on all U.S. orders. Start with our freshly roasted coffee and taste the difference fresh beans make in every cup.
