

Last Updated: November 6, 2026
Quick Summary
Beginners should first buy a grinder, a scale with a timer, and a tamper that matches their basket, because these control dose, yield and puck density. Add a steaming thermometer if you steam milk, and add other espresso accessories only when your shots reveal a need for them.
- Fresh grinding matters more for espresso than almost any other variable, so a grinder belongs at the top of the list.
- Measure your portafilter basket's inside diameter before buying a tamper, because mismatched sizes leave gaps that cause channeling.
- A common starting point is a 1:2 ratio, about 18 grams of coffee yielding roughly 36 grams of espresso.
- Add a WDT tool only when you see spurting, blond streaks or shots that taste sour and bitter at once.
- The OutIn Fino Portable Electric Coffee Grinder is $179.99, and the Barista Basics steaming thermometer is $16.00.
Table of Contents
- Start With the Essentials: What Every Beginner Needs
- Espresso Scale with Timer: Why Weighing Your Dose Matters
- Espresso Tamper Size Guide: Matching the Tamper to Your Basket
- WDT Tool for Espresso: When and How to Use It
- Milk Frothing Tools: Thermometer, Pitcher and Cups
- Espresso Machine Cleaning Accessories: Keeping Gear Working Long-Term
- Building Your First Setup Within a Realistic Budget
- Frequently Asked Questions
Start With the Essentials: What Every Beginner Needs
Most beginners buy the wrong espresso accessories first. They spend heavily on a machine and then discover that a $10 tool would have produced a better shot. Cuppari Coffee built this guide for people who want to buy in the right order and stop wasting money.
For a home espresso setup, the essentials are a grinder, a way to weigh your dose, a tamper that fits your basket, and a milk pitcher or thermometer if you steam milk. Everything else is an upgrade. Fresh grinding matters more for espresso than almost any other variable, which is why a grinder belongs at the top of the list. The OutIn Fino Portable Electric Coffee Grinder offers 28 grind levels with stepless micro-adjustment, which gives you room to dial in shots from espresso to French press. If you are building a starter kit, the Espresso Set is a compact set for the shots you pull.
Start with those core items, then add accessories as you find a need for them.
Espresso Scale with Timer: Why Weighing Your Dose Matters
Weighing your coffee is one of the most useful ways to make shots repeatable. Volume scoops vary with how the grounds settle, so two "same" doses can differ noticeably. A scale with a timer lets you track dose in grams, yield in grams and shot time in seconds, so you can change one variable at a time.
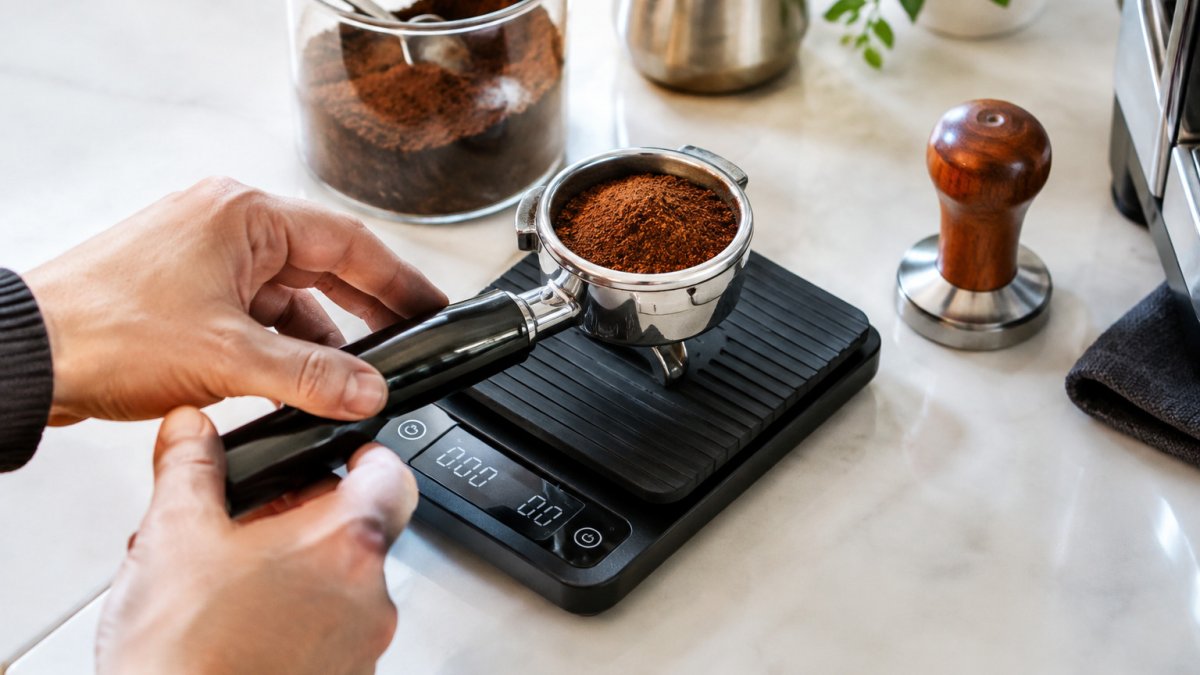
Use the scale to measure the grounds going into the basket, then the liquid coming out. A common starting point is a 1:2 ratio, meaning roughly 18 grams of coffee yielding about 36 grams of espresso, though the right ratio depends on your beans and taste. If you want to go deeper on picking one, our guide on how to choose a coffee scale for precision walks through the specs that matter.
Espresso Tamper Size Guide: Matching the Tamper to Your Basket
A tamper that is too large or too small for your basket will leave gaps around the edge of the puck, and water will channel through those gaps. Measure your portafilter basket's inside diameter before you buy, and pick a tamper that matches it. Your machine's manual or the basket packaging usually lists the size.
Tamping pressure matters less than level, even compression. Press straight down, keep the tamper flat, and polish the surface lightly. Consistency here does more for shot quality than a heavy-handed press.
WDT Tool for Espresso: When and How to Use It
A WDT (Weiss Distribution Technique) tool is a handle holding a cluster of fine needles that you stir through loose grounds before tamping. It breaks up clumps and spreads grounds evenly through the basket, which reduces channeling, the path-of-least-resistance problem where water punches through one weak spot instead of saturating the whole puck. Channeling shows up as spurting from one side of the portafilter, blond streaks in the flow, or a shot that tastes both sour and bitter at once.
What to look for in a WDT tool
Needle gauge is the spec that matters most. Most practitioners find that needles in the 0.3 mm to 0.4 mm range are stiff enough to break up clumps without dragging the bed of grounds around; needles thicker than about 0.5 mm tend to push coffee rather than separate it, and very thin acupuncture-style needles bend easily. A tool with 6 to 9 needles spaced across roughly 2 to 2.5 inches covers a standard 58 mm basket in a few passes. Adjustable-depth tools let you keep the needle tips above the basket rim so you do not gouge the puck.
How to use it, step by step
- Dose your grounds into a dry basket and give the portafilter a gentle side-to-side shake to level the bed.
- Rest the WDT tool on the basket rim and stir in slow circles, working from the center outward, for about 10 to 15 seconds. Keep the needles vertical.
- Lift the tool straight up, tap the portafilter once on the counter to settle the bed, then tamp level with even pressure.
Watch out: stirring aggressively or at an angle can create the very uneven density you are trying to fix, so keep the motion slow and the needles upright.
When to skip it
If your grinder produces fluffy, clump-free grounds and your shots already run evenly with a level tamp, a WDT tool adds a step without adding much. It earns its place when you change beans often, grind fine for light roasts, or see spray and uneven flow. For the full method and troubleshooting, see our WDT tool how-to.
The table below summarises the main signs of channeling, their causes and the fixes the article recommends.
| Problem | Cause | Fix |
|---|---|---|
| Spurting from one side | Uneven puck density | Stir with a WDT tool before tamping |
| Blond streaks in the flow | Water channeling through weak spots | Break up clumps and level the bed |
| Shot tastes sour and bitter at once | Channeling and uneven extraction | Stir slowly, keep needles vertical |
| Uneven flow despite level tamp | Clumped grounds from the grinder | Add a WDT step to spread grounds evenly |
Milk Frothing Tools: Thermometer, Pitcher and Cups
If you steam milk, a thermometer helps you hit a consistent temperature instead of guessing by feel. The Barista Basics 7" Large Steaming Thermometer has a -18 to 104°C (0 to 220°F) range and a target indicator for the 140 to 170°F zone, and it clips onto frothing pitchers. Choose it for steaming in larger pitchers.
For cups, a double-wall glass helps you judge microfoam and pour latte art, since you can see the milk's texture against the glass. The Latte Master Glass (Set of 2) holds 8.5 fl oz and is sold as a pair. A common mistake is steaming milk too hot, which scalds it and kills its sweetness. Keep an eye on the thermometer and stop before the milk gets too hot to hold comfortably.
Espresso Machine Cleaning Accessories: Keeping Gear Working Long-Term
Coffee oils build up quickly, and residue on a portafilter or steam wand affects flavor fast. A dedicated microfiber towel keeps gear clean between shots. The Barista Towel Set (2-Pack) is dual-sided, with one side for absorbing residue and the other for polishing, and it dries quickly with a hanging loop for storage.
Rinse the portafilter after each use, wipe the steam wand right after steaming, and run a backflush on a schedule your machine's manual recommends.
Building Your First Setup Within a Realistic Budget
The most useful way to budget for espresso accessories is to buy in stages, in the order your shots tell you to. New owners who buy everything at once usually end up with tools they do not yet know how to use, while owners who buy in sequence spend less and learn faster.
Stage 1: The non-negotiables
Start with a grinder, a scale with a timer, and a tamper sized to your basket. These three control dose, yield, and puck density, the variables that decide whether a shot is repeatable. In the Cuppari catalog, the OutIn Fino Portable Electric Coffee Grinder is $179.99, and the Espresso Set is a compact set of two double-walled cups for the shots you pull. If you steam milk, add the Barista Basics 7" Large Steaming Thermometer at $16.00 so you stop guessing temperature by feel.
Stage 2: Fix problems as they appear
Add a WDT tool only when you see uneven extraction, spray from one side of the portafilter, blond streaks, or shots that taste sour and bitter together. Add the Barista Towel Set (2-Pack) at $9.99 early, because wiping the steam wand and portafilter after every use is the cheapest maintenance you will ever do.
Stage 3: Comfort and presentation
Cups and a milk pitcher are upgrades, not requirements. The Latte Master Glass (Set of 2) helps you judge microfoam and pour latte art, but you can pull good shots into any sturdy cup while you save.
Compatibility checks before you check out
Match the tamper to your basket's inside diameter, 58 mm is common on prosumer machines, while many entry machines use 51 mm or 54 mm baskets, and a mismatched tamper leaves gaps at the edge. Confirm your portafilter is bottomless or spouted before buying a dosing funnel or puck screen, since those tools are sized to the basket, not the handle. Check that your scale fits under the group head with your largest cup in place; a scale that is too tall forces you to dose in a separate cup and adds cleanup.
A realistic total
A staged starter kit built around the items above runs roughly $206 before tax and shipping ($179.99 grinder + $16.00 thermometer + $9.99 towel set), with the Espresso Set as an additional purchase at $34.99. That is the floor, not the ceiling, add WDT, knock box, and cups only as your workflow exposes a need. Buying in this order keeps you from spending on tools you do not yet need, and it means every dollar goes toward a variable you can actually taste.
Frequently Asked Questions
What accessories do you need for an espresso machine?
Most beginners need a scale with a timer to weigh the dose and yield, a tamper that fits the portafilter basket, and a WDT tool to break up clumps in the grounds. A milk thermometer or steaming pitcher becomes useful once you start making milk drinks. Start with the scale and tamper, since they affect shot consistency the most, and add the rest as your routine develops.
Do you need a scale to make espresso?
A scale is not strictly required, but it makes repeatable shots much easier. Espresso is typically judged by dose in grams and yield in grams, with timing used alongside. Without a scale, you are guessing at dose by volume, and two shots that look identical can taste very different. A scale with a timer lets you track dose, yield and shot time together, which is the fastest way to learn what changes flavor.
What is the difference between a distribution tool and a WDT tool?
A WDT (Weiss Distribution Technique) tool is a set of fine needles that you stir through the grounds in the basket to break up clumps before tamping. A distribution tool is a broader category that also includes leveling tools and tampers with built-in levelers. Both aim for an evenly distributed puck, which helps water flow uniformly during extraction. A WDT tool is a low-cost addition that many beginners find improves consistency quickly.
How much should a beginner spend on espresso accessories?
The core kit is inexpensive. The OutIn Fino Portable Electric Coffee Grinder is $179.99 if you need a grinder, while the Barista Basics 7-inch steaming thermometer is $16.00, the Barista Towel Set (2-Pack) is $9.99, and the Espresso Set is $34.99. Prioritize a scale and tamper first, then add a thermometer or towels as your routine needs them. Buying in stages keeps you from paying for tools you never use.
Starter kit item prices in the Cuppari catalog
